The Lemon Pepper Chicken Sandwich is the ultimate intersection of zesty citrus brightness and savory, golden-brown crunch. Imagine biting into a glossy, toasted pretzel bun that gives way to a pebbled, extra-crispy chicken cutlet, topped with a blanket of melted provolone and the sharp bite of fresh arugula. This isn’t just another lunch option; it is a gourmet experience captured in a handheld masterpiece that balances acidity and richness in every bite.
Whether you are a fan of a classic buffalo chicken sandwich or you prefer the deep spices of a Nashville hot chicken sandwich, this lemon pepper version offers a sophisticated, bright alternative. The visual appeal—featuring vibrant lemon wheels and cracked black pepper—makes it a centerpiece for any table. Let’s dive into the culinary science of achieving that perfect “pebbled” breading and the structural integrity required for a world-class sandwich.
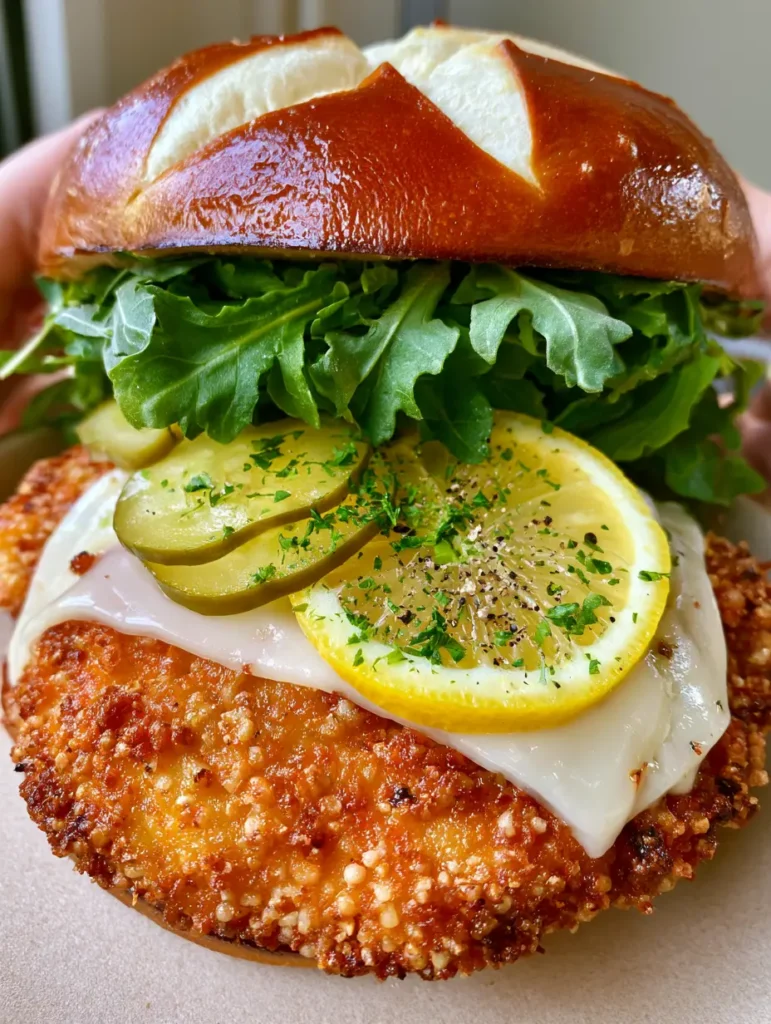
Why This Lemon Pepper Chicken Sandwich Recipe Works
- The Pretzel Bun Advantage: A deep cross-scored, glossy pretzel bun provides a sturdy, slightly sweet base that stands up to the juicy chicken and melted cheese without getting soggy.
- High-Definition Texture: Using a specific breading technique creates a visible pebbled texture on the chicken cutlet, ensuring a loud “crunch” with every single mouthful.
- Balanced Flavor Profile: The acidity of the translucent dill pickles and the fresh lemon wheel cuts through the richness of the melted white provolone cheese.
- Sensory Contrast: Jagged-edged baby arugula adds a peppery freshness that complements the coarse cracked black pepper and dried parsley flakes.
Essential Ingredients for the Ultimate Zesty Crunch
Chicken Breasts: Use two large (approx. 1 lb / 450g) breasts, butterflied and pounded to an even thickness. This ensures even cooking and a perfect fit for your pretzel buns.
Pretzel Buns: These should be glossy and deep brown. Toasting them with a bit of butter creates a moisture barrier that keeps the sandwich structurally sound.
Lemon Pepper Seasoning: This is the heart of the Lemon Pepper Chicken Sandwich. Look for a blend with high-quality dried lemon peel and coarse black pepper for the most authentic flavor.
Panko Breadcrumbs: 1.5 cups (90g) of Panko provides that signature pebbled, extra-crispy exterior that looks incredible in photos and tastes even better.
Provolone Cheese: A thick slice (approx. 1 oz / 28g) of mild, white provolone. It melts beautifully without overpowering the delicate citrus notes of the chicken.
Dill Pickles: Use three thin, translucent rounds per sandwich. The vinegar acidity is crucial for balancing the fried elements of the dish.
Fresh Lemon Wheels: One thin slice per sandwich. While it looks stunning, it also allows a tiny bit of fresh juice to mingle with the melted cheese as you eat.
Baby Arugula: 1/2 cup (10g) of fresh, jagged-edged leaves. Arugula offers a much more sophisticated flavor profile than standard iceberg lettuce.
Foundational Additions: You will also need 1/2 cup (60g) all-purpose flour for dredging, 2 large eggs beaten with 1 tbsp (15ml) water for the wash, and 1/2 cup (120ml) neutral oil (like canola or grapeseed) for searing.
The Pro-Level Equipment You’ll Need
To achieve the visual and textural results seen in our Lemon Pepper Chicken Sandwich, you need a heavy-bottomed skillet—ideally cast iron. A cast iron skillet retains heat better, ensuring that the oil temperature doesn’t drop when the chicken hits the pan, which is the secret to a golden-brown, non-greasy crust. You will also want a meat mallet for pounding the chicken to a uniform 1/2-inch thickness, ensuring the chicken is as tender as our famous crack chicken tenders.
Step-By-Step Instructions for the Perfect Cutlet
1. Preparing the Chicken for Maximum Tenderness
Start by butterflying your chicken breasts. Place your hand flat on top of the breast and slice horizontally through the center, stopping just before you hit the other side. Open it like a book and place it between two sheets of plastic wrap.
Use the flat side of a meat mallet to pound the chicken to a consistent 1/2-inch (1.25cm) thickness. This ensures the chicken cooks at the same rate and covers the entire surface area of the pretzel bun. Season both sides lightly with salt and a half-teaspoon of lemon pepper seasoning before breading.
2. The Three-Stage Breading Process
Set up three shallow bowls. In the first, place the all-purpose flour. In the second, whisk together the eggs and water. In the third, combine the Panko breadcrumbs with 1.5 tablespoons (12g) of lemon pepper seasoning and 1 teaspoon (1g) of dried parsley flakes.
Dredge each cutlet in flour, shaking off the excess. Dip it into the egg wash, ensuring it is fully coated, then press it firmly into the Panko mixture. Press the crumbs into the meat with your palms to create that pebbled, high-relief texture that looks so striking in a Lemon Pepper Chicken Sandwich.

3. Achieving the Golden-Brown Sear
Heat your oil in the skillet over medium-high heat. You will know the oil is ready when a stray breadcrumb sizzles immediately upon contact. Carefully lay the chicken cutlets into the pan, moving them away from you to avoid splashes.
Fry for 3-4 minutes per side. Look for a deep, golden-brown crust. The sound should be a consistent, vigorous sizzle. Use a meat thermometer to ensure the internal temperature reaches 165°F (74°C). Once cooked, place a slice of provolone cheese on each cutlet and cover the pan for 30 seconds to achieve that perfectly draped, partially melted look.
4. Toasting the Glossy Pretzel Buns
While the chicken rests for a minute, split your pretzel buns. Spread a thin layer of butter on the cut sides and place them face-down in a clean skillet or under a broiler. Watch for the interior to turn a pale golden-brown while the dark, glossy exterior remains intact. This step is essential for the Lemon Pepper Chicken Sandwich to have that professional, “gourmet” feel.
5. The Final Artful Assembly
Lay the bottom bun on a neutral surface. Pile a generous layer of fresh, jagged arugula leaves on the base. Place the crispy chicken cutlet with the melted cheese directly on top of the greens. Arrange three thin dill pickle rounds on the cheese, followed by a single vibrant yellow lemon wheel.
To finish, sprinkle a pinch of dried parsley flakes and a generous crack of coarse black pepper over the top of the lemon and cheese. This provides the final visual “pop” and a punch of raw spice. Place the top bun (with its deep cross-score) on top and serve immediately while the textures are at their peak.
Expert Tips for Sandwich Success
- Oil Temperature is Key: If your oil is too cold, the breading will absorb the grease and become soggy. If it’s too hot, the outside will burn before the chicken is cooked. Aim for 350°F (175°C).
- Don’t Over-Crowd: Fry one or two cutlets at a time. Overcrowding the pan drops the oil temperature and ruins the “pebbled” breadcrumb effect.
- The Lemon Trick: If you find the lemon wheel too tart to eat whole, you can lightly char the lemon slice in the pan for 30 seconds before adding it to the sandwich to mellow the acidity.
- Cheese Placement: Always melt the cheese on the chicken while it’s still in the pan. The residual heat is the only way to get that professional drape without overcooking the meat.
How to Store and Reheat Your Sandwich
The Lemon Pepper Chicken Sandwich is best enjoyed fresh to preserve the crunch. However, if you have leftovers, store the chicken cutlets and the buns separately in airtight containers in the refrigerator for up to 3 days. Do not store the sandwich fully assembled, as the pickles and arugula will wilt and make the bun soggy.
To reheat, place the chicken cutlet in an air fryer at 375°F (190°C) for 3-5 minutes or in an oven until the crust recrisps. Toast the bun separately. Reassemble with fresh arugula and a new lemon wheel for the best experience. If you enjoy meal prepping chicken, you might also like our easy chicken shawarma for a different flavor profile during the week.
What to Serve with a Lemon Pepper Chicken Sandwich
Since this sandwich has a bright, acidic profile, it pairs beautifully with sides that offer a bit of sweetness or creaminess. A creamy pasta salad is a classic choice, or you can lean into the Mediterranean vibes with a lemon-kissed orzo side (coming soon). For a lighter option, a simple green salad with a honey-mustard vinaigrette complements the lemon pepper seasoning perfectly.
If you’re serving this at a party alongside other handhelds, consider making a batch of BBQ chicken nachos to give your guests a variety of textures and heat levels.
Frequently Asked Questions
Yes! To air fry, spray the breaded cutlets generously with oil and cook at 390°F (200°C) for 12-15 minutes, flipping halfway through, until the internal temperature reaches 165°F.
Absolutely. Chicken thighs will stay even juicier, though they may require an extra minute of cooking time due to the higher fat content.
Toast the bun quickly under a high broiler or in a hot pan with butter for only 30-60 seconds. This crisps the interior while keeping the pretzel exterior soft.
While it’s partly decorative, a very thinly sliced lemon wheel provides a burst of fresh juice. If you prefer less tartness, you can squeeze the lemon over the chicken and remove the slice before eating.
The key is the flour dredge. Ensure the chicken is patted dry before dipping in flour, and always let the breaded chicken rest for 5 minutes before frying to allow the coating to set.
The Ultimate Lemon Pepper Chicken Sandwich Recipe
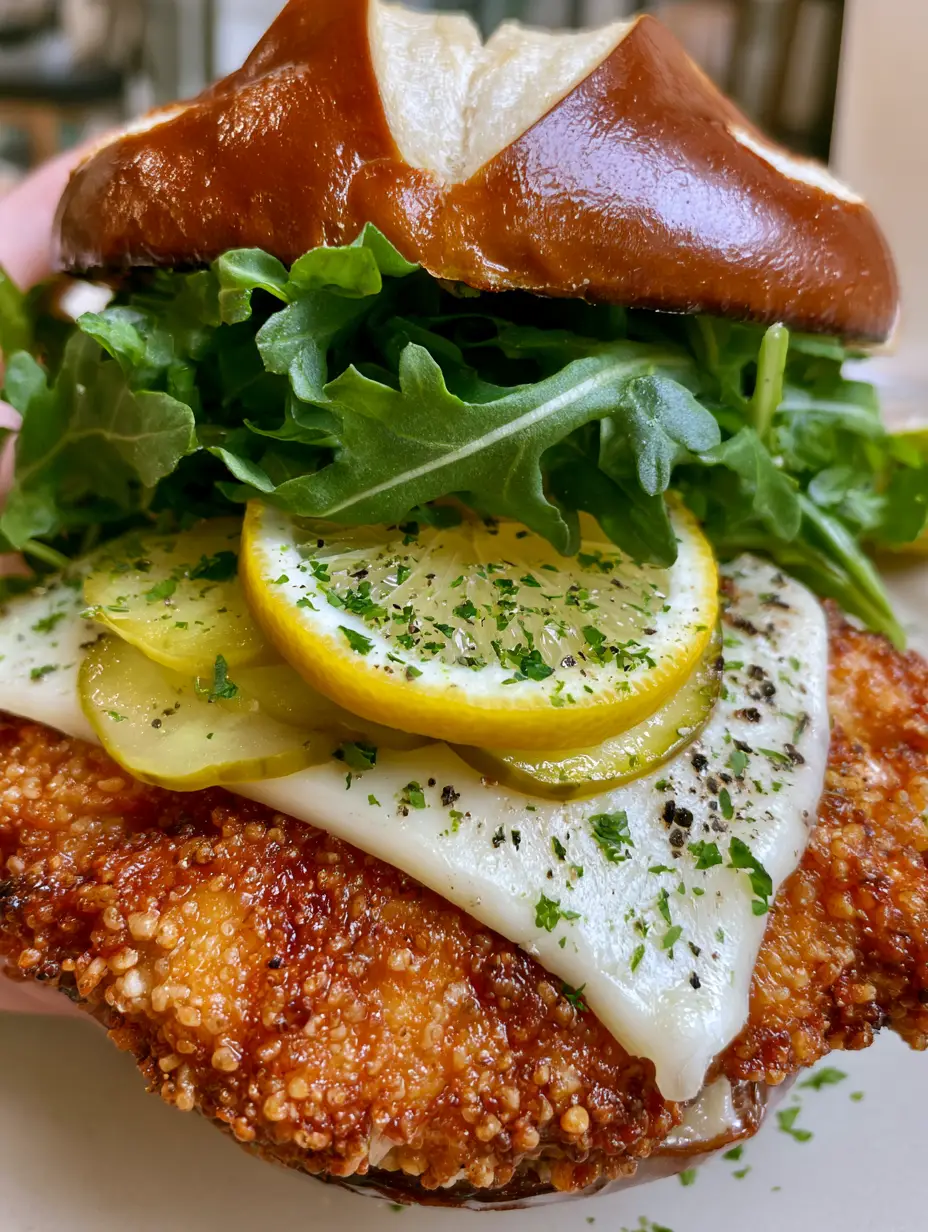
Lemon Pepper Chicken Sandwich on a Toasted Pretzel Bun
Ingredients
Equipment
Method
- Butterfly and pound chicken breasts to 1/2-inch thickness. Season lightly with salt and 1/2 tsp lemon pepper.
- Dredge in flour, dip in egg wash, then press firmly into panko mixed with remaining lemon pepper and parsley.
- Heat oil to 350°F (175°C). Fry chicken for 3-4 minutes per side until deep golden brown and pebbled.
- Place provolone on chicken in the last 30 seconds of cooking. Cover pan to melt.
- Toast pretzel buns. Layer arugula, chicken, pickles, and a lemon wheel. Sprinkle with pepper and parsley.
Notes
Press panko firmly into the chicken to ensure it doesn't fall off during frying.

Closing & Call to Action
This Lemon Pepper Chicken Sandwich is a masterclass in texture and flavor balance. From the crunch of the panko to the zesty zing of the fresh lemon, it’s a recipe that will quickly become a household favorite. If you made this and loved the results, please leave a comment below and let us know how your “pebbled” crust turned out!
Don’t forget to follow us on Pinterest for more gourmet sandwich inspiration. Sharing this recipe with your friends helps us keep the kitchen lights on and the new recipes coming. Happy cooking!


