There is nothing quite like the sensory explosion of biting into warm, handcrafted Cheese Stuffed Pretzels. The initial crunch of a glossy, salt-encrusted shell gives way to a soft, airy crumb, eventually revealing a molten, thick cream cheese heart.
These aren’t your average mall snacks; these are scientifically engineered bites of comfort. We have meticulously designed this recipe to mirror the artisanal quality of a professional bakery, focusing on that deep amber hue and visible crust cracks.
Whether you are hosting a game day or looking for a weekend baking project, these Cheese Stuffed Pretzels offer a professional-grade result right from your home oven. Every bite is a balance of saline crunch and creamy indulgence.
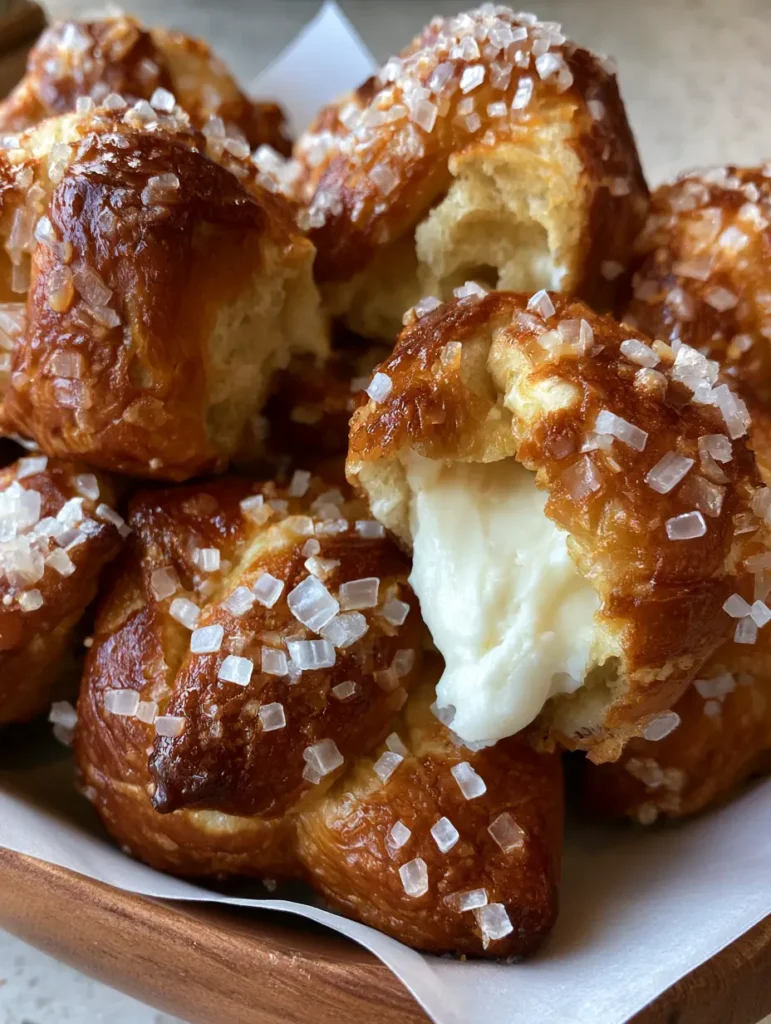
Why These Cream-Filled Soft Pretzels Are Superior
- The Perfect Contrast: A deep, glossy amber crust that provides a structural snap before hitting the pillowy interior.
- Gooey Core Architecture: A thick, white cream cheese filling that stays luscious and oozing rather than drying out during the bake.
- Visual Precision: Heavily sprinkled with large, square, translucent coarse sea salt crystals for that iconic gourmet aesthetic.
- Professional Texture: A soft, airy crumb that highlights the chewiness achieved through a traditional alkaline bath.
Essential Elements for the Ultimate Salty Crust
The foundation of any Cheese Stuffed Pretzels recipe begins with high-quality flour and a controlled fermentation. We use bread flour to ensure a high protein content, which provides the necessary gluten structure to hold the heavy cheese filling.
Bread Flour (approx. 4 cups / 500g): This provides the “chew” that distinguishes a pretzel from a standard dinner roll. The high protein allows for a thin but strong dough wall that won’t leak cheese.
Warm Water (1.5 cups / 360ml): This hydrates the yeast and activates the dough. Ensure it is between 105°F and 110°F (40°C-43°C) to keep the yeast happy without killing it.
Active Dry Yeast (2.25 tsp / 7g): The engine of our dough. This creates the soft, airy crumb we see in professional photography by producing carbon dioxide bubbles.
Unsalted Butter (2 tbsp / 28g): Melted and cooled, this fat softens the crumb slightly, making the interior feel rich against the salty exterior. If you enjoy rich appetizers, you might also like our roasted garlic cowboy butter for dipping.
Granulated Sugar (1 tbsp / 12g): This isn’t just for sweetness; it feeds the yeast and assists in the Maillard reaction, helping achieve that deep amber color.
Fine Sea Salt (1 tsp / 5g): This seasons the dough itself. Never skip this, or the bread will taste flat despite the coarse salt on top.
Cream Cheese (8 oz / 225g): Use full-fat bricks for the best “ooze.” Avoid whipped versions, as they contain too much air and will collapse under heat. For a similar creamy vibe, check out our classic jalapeno poppers.
Baking Soda (1/2 cup / 120g) or Food-Grade Lye: This is for the alkaline bath. This chemical reaction is what creates the glossy, deep brown crust and that distinct “pretzel” flavor.
Coarse Sea Salt (2 tbsp / 30g): Specifically, look for large, square crystals. This provides the “crunch” and the visual pop seen in high-end food photography.
Must-Have Tools for Pretzel Perfection
To achieve the handheld smartphone photo look, you need more than just a tray. A large stockpot is essential for the alkaline bath, allowing the dough to expand freely without sticking.
A slotted spatula or “spider” strainer is vital for lifting the delicate dough out of the hot water without tearing the surface. A parchment-lined baking sheet ensures the high sugar and alkaline content doesn’t stick to your pans.

The Architecture of the Perfect Stuffed Pretzel
Creating the Yeasted Dough Base
Start by whisking your warm water, sugar, and yeast in a stand mixer bowl. Let it sit for about 5-10 minutes until it becomes foamy and smells like fresh bread—this is your sensory cue that the yeast is alive.
Add the melted butter and salt, then gradually incorporate the flour using a dough hook. Knead on medium speed until the dough is smooth and clears the sides of the bowl; it should feel tacky but not sticky to the touch.
The First Rise and Fermentation
Place the dough in a lightly oiled bowl and cover with a damp cloth. Let it rise in a warm, draft-free spot for about 60 minutes or until it has doubled in size. This step is crucial for that soft, airy crumb structure.
While the dough rises, prepare your filling. Whip the cold cream cheese slightly so it’s manageable, but keep it thick. Pro-tip: Chill small dollops of cream cheese on a plate in the freezer for 15 minutes to make stuffing easier.
Stuffing and Shaping the Bites
Punch down the risen dough and divide it into 24 equal pieces. Flatten each piece into a small disc, place a chilled cream cheese dollop in the center, and pinch the edges tightly to seal.
Roll the ball between your palms to ensure a smooth, spherical shape. Any gaps in the seal will cause the cheese to leak during the bake, so be thorough!
The Alkaline Bath: The Secret to the Glossy Crust
Bring a large pot of water to a boil and slowly add the baking soda (be careful, it will foam up!). Drop the pretzel bites in for exactly 30 seconds. They should puff up and look slightly wrinkled.
Remove them with a slotted spoon and place them onto the parchment paper. This bath gelatinizes the starch on the surface, which is what creates the deep amber, glossy finish in the oven.
Baking to Golden-Brown Perfection
Preheat your oven to 425°F (220°C). Immediately after the bath, sprinkle the wet dough heavily with the coarse square salt crystals. This ensures the salt “glues” to the crust before it dries.
Bake for 12-15 minutes. Watch for the visual cue: the crust should turn a deep, mahogany brown with visible micro-cracks forming on the surface. The smell of toasted grain and salt will fill your kitchen.
Expert Tips for Bakery-Style Results
- Cold Filling is Key: Always use cold or semi-frozen cream cheese dollops. This prevents the cheese from liquefying and exploding out of the dough before the bread is set.
- The 30-Second Rule: Don’t leave the pretzels in the alkaline bath longer than 30 seconds, or they will develop a metallic, soapy aftertaste.
- Seal Tension: When pinching the dough closed, ensure no cream cheese touches the edges you are trying to seal. Fat prevents the dough from sticking to itself.
- The Oven Temp: High heat is non-negotiable. 425°F (220°C) is required to set the crust quickly and achieve the Maillard reaction without overcooking the cheese.
Storing and Reviving Your Pretzels
Cheese Stuffed Pretzels are best enjoyed within minutes of leaving the oven while the center is still gooey. However, they can be stored in an airtight container for up to 2 days.
To reheat, avoid the microwave as it makes the crust rubbery. Instead, use a toaster oven or air fryer at 350°F (175°C) for 3-5 minutes to restore the snap to the crust and the melt to the center.
These also freeze beautifully! Once baked and cooled, freeze them in a single layer. Reheat directly from frozen at 375°F (190°C) for 8-10 minutes for a quick snack that tastes freshly baked.
What to Serve with Savory Stuffed Bites
These pretzels are a meal on their own, but they pair perfectly with bold flavors. If you want to keep the party going, serve them alongside a spicy jalapeno slaw (coming soon) for a cooling, crunchy contrast.
For a full appetizer spread, they complement bang bang chicken tenders or even a bowl of creamy peppercorn sauce (coming soon) for dipping the crusts.
If you’re looking for a sweet ending after these salty treats, our brownie bottom cheesecake bites are the perfect follow-up to the cream cheese theme.
Frequently Asked Questions
You can, though the crust may not be as traditionally glossy. Air fry at 375°F (190°C) for 8-10 minutes after the water bath for a quick alternative.
Yes, while lye provides the deepest color, a strong baking soda bath (1/2 cup per 8 cups of water) will still achieve a beautiful glossy, amber finish.
Chill or slightly freeze the cream cheese dollops before stuffing. Most importantly, ensure the dough seal is completely dry and pinched tightly with no filling touching the edges.
Traditional pretzel salt or coarse sea salt with large, square crystals provides the best visual appeal and the classic salty crunch that won’t melt instantly.
This usually happens if the water bath wasn’t alkaline enough or if the pretzels weren’t boiled long enough. Ensure the water is at a rolling boil and use the full amount of baking soda.
The Ultimate Cheese Stuffed Pretzels Recipe
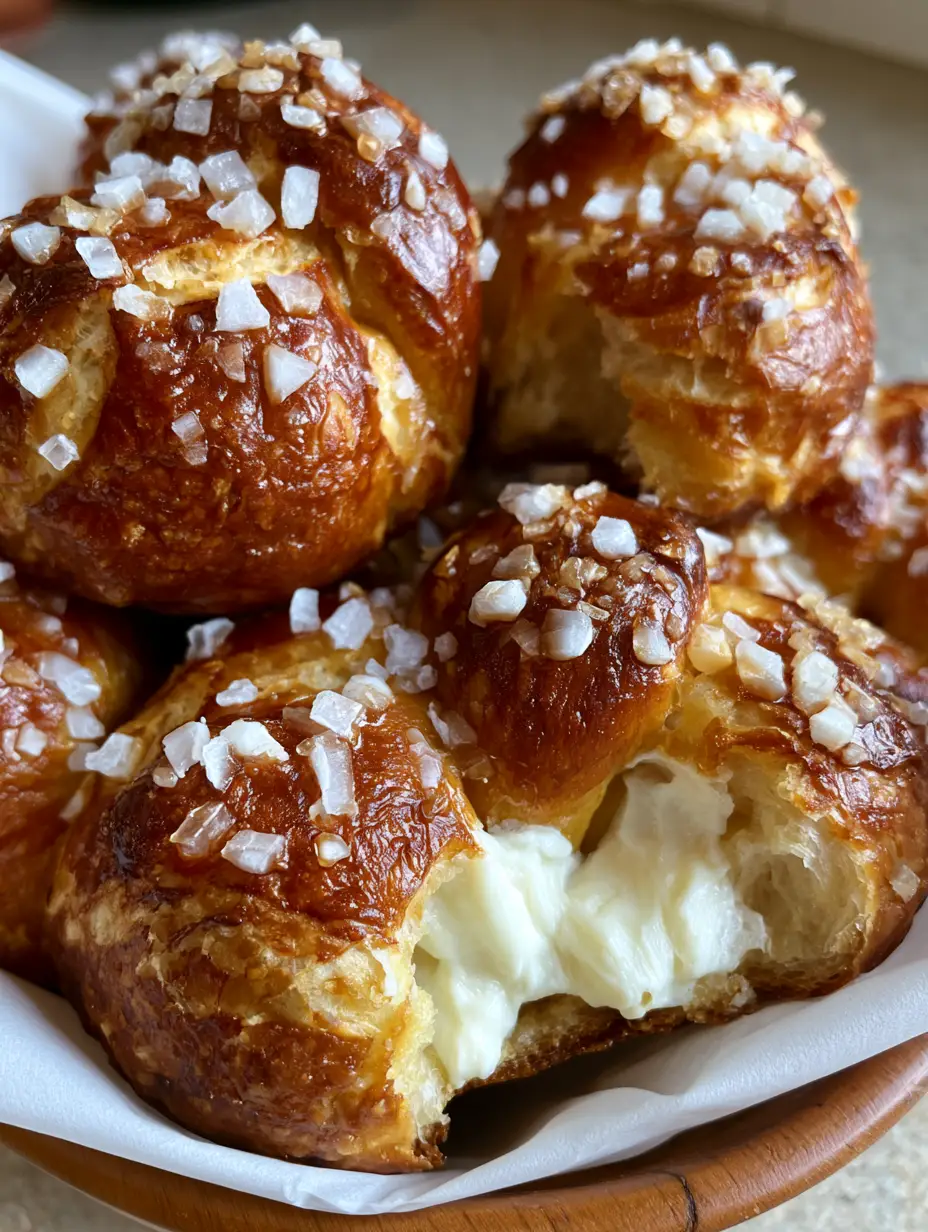
Cheese Stuffed Pretzels with a Glossy Deep Amber Crust
Ingredients
Equipment
Method
- In a stand mixer bowl, combine warm water, sugar, and yeast. Let stand for 5-10 minutes until foamy.
- Add butter, fine salt, and flour. Knead with a dough hook for 5 minutes until smooth and elastic.
- Cover and let rise in a warm place for 60 minutes until doubled in size.
- Divide dough into 24 pieces. Flatten each, place a 1-tsp dollop of cream cheese in the center, and pinch tightly to seal.
- Boil 8 cups of water with baking soda. Dip each bite for 30 seconds, then place on a lined baking tray.
- Sprinkle with coarse salt. Bake at 425°F (220°C) for 12-15 minutes until deep amber with visible cracks.
Notes
Use bread flour instead of all-purpose for a chewier texture.

Final Thoughts on This Salty Classic
Mastering Cheese Stuffed Pretzels is a rite of passage for any home baker. The combination of the alkaline-treated crust and the rich, hidden filling creates a gourmet experience that far exceeds anything store-bought.
We would love to see your glossy, amber creations! Tag us in your photos or leave a comment below with your favorite dipping sauce pairings. Don’t forget to save this recipe to your “Appetizer” board on Pinterest for your next gathering.


