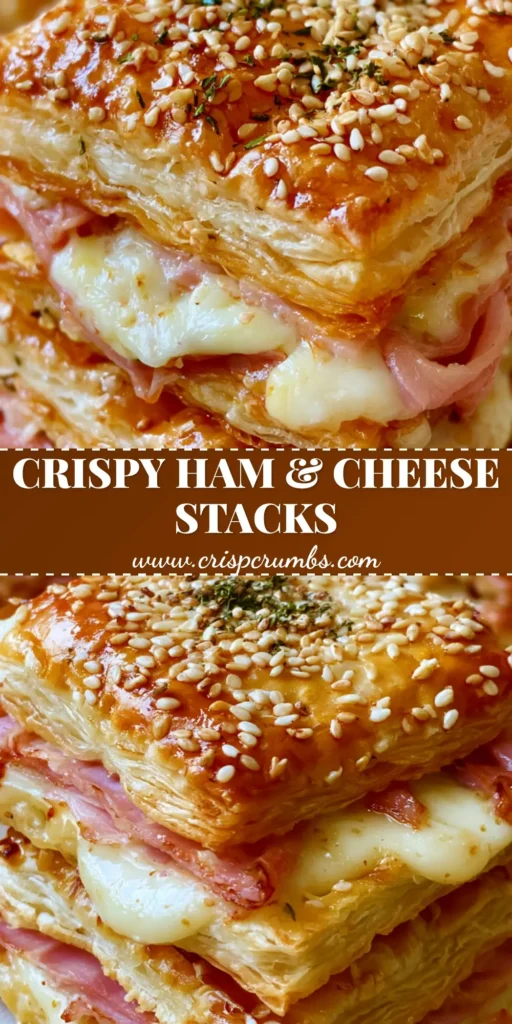
There is nothing quite like the shattered-glass crunch of a perfectly baked Ham and Cheese Puff Pastry. This recipe isn’t just a snack; it is a masterclass in texture, combining the buttery lamination of French-style pastry with the savory depth of thin-shaved ham and gooey, melted white cheese. Inspired by the rustic charm of a Parisian boulangerie but designed for the modern home kitchen, these handheld squares are a visual and culinary triumph.
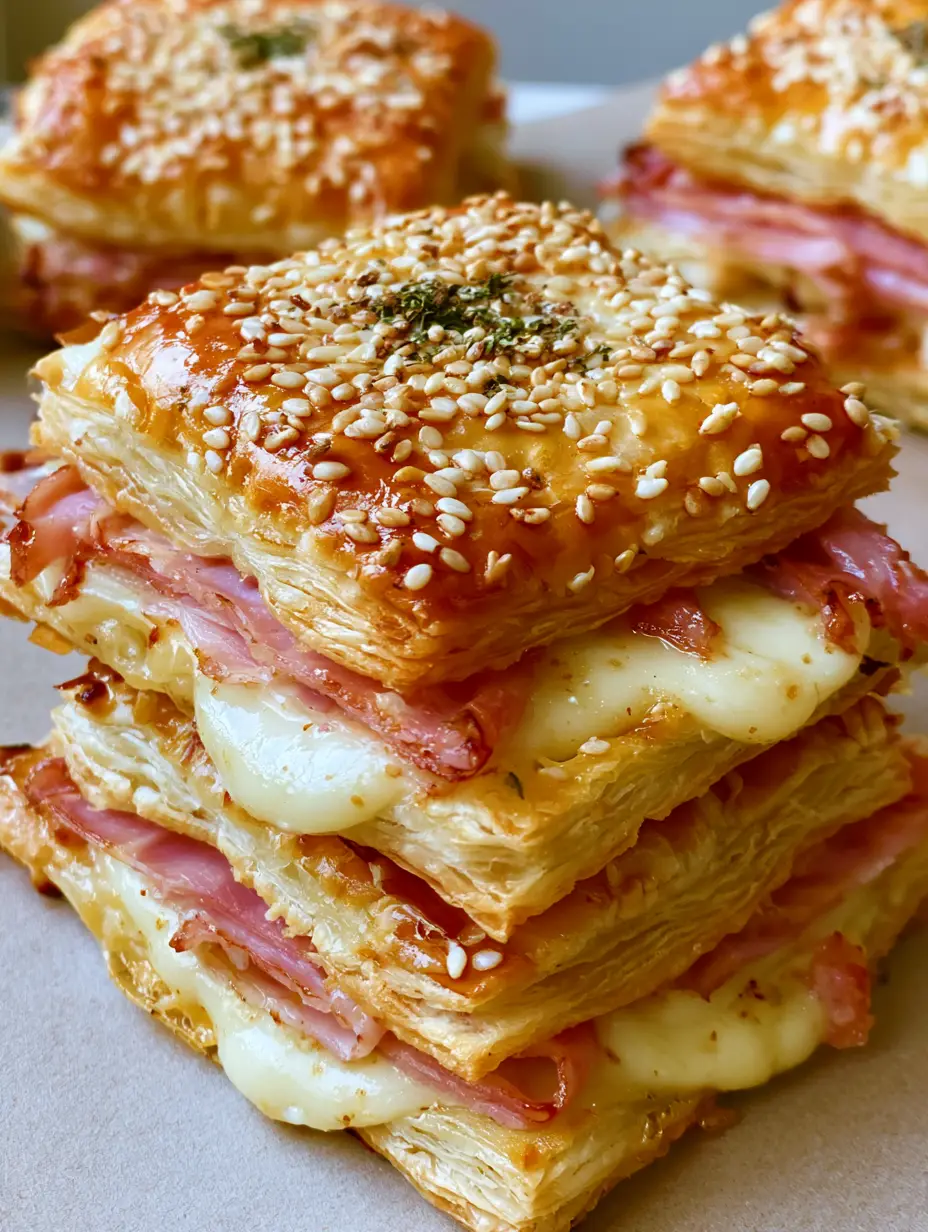
By using a specific stacking technique described in our visual blueprint, we achieve a towering, three-layer pastry structure that maximizes the surface area for the Maillard reaction. Every bite offers a contrast between the shiny, egg-wash-glazed top—adorned with toasted sesame seeds and dried herbs—and the soft, savory interior where the cheese has fused with the ham ribbons. Whether you are hosting a brunch or looking for a sophisticated lunch, this Ham and Cheese Puff Pastry delivers high-end results with minimal effort.

Why This Triple-Layered Savory Pastry Works
- Structural Lamination: By utilizing three distinct layers of puff pastry per square, we create extra vertical height and “lift,” ensuring a more dramatic and satisfying crunch.
- The “Gooey” White Cheese Factor: We specify high-moisture white cheeses like Gruyère or Swiss to ensure that iconic “cheese pull” and a stark visual contrast against the pink ham.
- Shatter-Crisp Texture: The combination of a high-temperature bake and a professional egg wash creates a top crust that is both shiny and intensely crisp.
- Aromatic Finishing: The inclusion of toasted white sesame seeds and dried green herb flakes adds an earthy, nutty undertone that balances the richness of the butter and ham.
The Essential Elements for Flaky Perfection
Success in making a Ham and Cheese Puff Pastry starts with the temperature and quality of your components. Here is what you need to achieve the professional look and taste found in our visual blueprint.
2 Sheets (approx. 450g) Puff Pastry: Look for “all-butter” puff pastry in the freezer aisle for the best flavor and most significant rise. Keep it chilled until the very last second to ensure the fat doesn’t melt before hitting the oven.
1/2 lb (225g) Thinly Sliced Savory Ham: Use a high-quality deli ham, such as Black Forest or Honey Ham, shaved into thin ribbons. Thin ribbons create more air pockets between the layers, allowing the heat to penetrate and melt the cheese evenly.
1.5 Cups (170g) Shredded White Cheese: A blend of Gruyère and white cheddar provides the perfect balance of sharp flavor and gooey melting properties. This ensures the “white cheese” visual specified in our culinary blueprint.
1 Large Egg: This is the secret to the “shiny egg wash glaze” mentioned in the visual prompt. It provides the protein needed to achieve a deep golden-brown color and acts as the “glue” for your toppings.
1 Tbsp (9g) White Sesame Seeds: These provide a nutty crunch and a beautiful visual texture against the golden pastry. Toasting them during the bake releases their natural oils for maximum flavor.
1 Tsp (0.5g) Dried Green Herb Flakes: Dried parsley or oregano adds a pop of color and a subtle Mediterranean aroma. These should be pinched over the top just before the pastry enters the oven.
Foundational Seasonings: Don’t forget a pinch of flaky sea salt and cracked black pepper. These “invisible” ingredients are essential for elevating the savory notes of the ham and cheese.
The Professional Kitchen Toolkit
To replicate the handheld smartphone photo aesthetic of perfectly stacked squares, you will need a few specific tools. A sharp pizza cutter or bench scraper is vital for getting clean, crisp edges on your pastry without squashing the delicate layers of dough. You will also want a heavy-duty baking sheet (half-sheet pan) lined with parchment paper to prevent sticking and ensure even heat distribution. A pastry brush is non-negotiable for applying that thin, even coat of egg wash that results in a professional shine. Lastly, a wire cooling rack is essential to prevent the bottom layers from becoming soggy as the steam escapes after baking.
The Master Blueprint: How to Assemble the Ultimate Stack
Preparing the Pastry Foundation
Start by lightly flouring your work surface and rolling out your chilled puff pastry sheets. You want to maintain a thickness of about 1/8 inch (3mm) to ensure the pastry has enough structure to support the ham and cheese. Use your cutter to create uniform 3-inch (7.5cm) squares. For each “stack,” you will need three squares. This architecture is what gives the dish its “thick, multi-layered” appearance seen in our reference photos.
The Layering Logic: Ham Ribbons and Cheese
Place the first square on your parchment-lined tray. Layer a small nest of ham ribbons followed by a generous sprinkle of white cheese, leaving a tiny border around the edges. Repeat this process with the second square, stacking it directly on top of the first. Finally, place the third pastry square on top. This “triple-decker” approach ensures that you have ham and cheese between every single layer of flaky dough.
Achieving the Golden-Brown Shine
Whisk your egg with a teaspoon of water until perfectly smooth with no visible strands of white. Brush the top layer of each stack generously, making sure the wash doesn’t drip down the sides, which could “glue” the layers together and prevent them from rising. While the egg wash is still wet, sprinkle the toasted white sesame seeds and dried green herb flakes over the top. The wet egg wash acts as the adhesive, ensuring your garnishes stay put during the bake.
The High-Heat Bake and Sensory Cues
Slide your tray into a preheated oven at 400°F (200°C). Watch for the “lift”—the moment the pastry edges begin to separate and rise into distinct, crisp layers. Within 20-25 minutes, the pastry should transform into a deep golden-brown. Listen for the faint sizzling of the cheese and look for the ham ribbons to slightly crisp at the edges. The cheese should be completely melted and bubbling out slightly from the sides of the stack.

Expert Tips for Ham and Cheese Success
- The Chill Factor: If your pastry becomes too soft while you are layering, pop the entire tray in the freezer for 10 minutes before baking. Cold butter is the only way to get that “multi-layered” crisp edge.
- Egg Wash Precision: Only brush the top. If the egg wash runs down the cut edges of the puff pastry, it will seal the layers together, and your stack will be lopsided rather than tall and proud.
- Cheese Selection: Avoid pre-shredded cheese in bags if possible. These often contain potato starch to prevent clumping, which can lead to a grainy melt rather than the “gooey” texture we are aiming for.
- Ham Moisture: If your ham is very “wet” or has a lot of brine, pat it dry with a paper towel. Excess moisture will create steam, which can make the inner layers of pastry gummy.
Storage, Reheating, and Make-Ahead Advice
These Ham and Cheese Puff Pastry squares are best enjoyed fresh from the oven, but they can be stored in an airtight container in the refrigerator for up to 3 days. To restore that signature “shattered glass” crunch, avoid the microwave at all costs—it will turn the pastry rubbery. Instead, reheat them in a 350°F (175°C) oven or air fryer for 5-7 minutes until the cheese is once again gooey and the pastry is crisp.
For those who love to meal prep, you can assemble the stacks and freeze them raw. Place them on a tray in the freezer until solid, then transfer to a freezer bag. You can bake them directly from frozen; just add an extra 5-10 minutes to the total baking time. This is a fantastic way to have a high-quality lunch ready in minutes.
What to Serve With Your Pastry Stacks
To balance the rich, buttery profile of the Ham and Cheese Puff Pastry, we recommend serving it with something bright or acidic. A crisp chickpea and black bean salad (coming soon) provides a refreshing textural contrast. If you are serving these as part of a larger spread, they pair beautifully with mini grilled cheese hawaiian rolls for a carb-lover’s dream.
For a dipping sauce, consider a side of cowboy butter (coming soon) to add a spicy, garlicky kick to the savory ham. If you’re looking for a more substantial meal, a steak and avocado bowl offers the healthy fats and protein needed to round out the plate. These pastries are incredibly versatile and fit into almost any meal plan.
Frequently Asked Questions
Absolutely! You can assemble them and keep them in the fridge for up to 4 hours, or freeze them raw for up to a month. Bake directly from the freezer for best results.
Yes, but they are very different. Puff pastry uses laminated butter for a thick, airy rise, while phyllo is paper-thin and results in a more brittle, flaky texture. This recipe specifically requires puff pastry.
Bake on the lower rack of your oven and use a parchment-lined baking sheet. For extra insurance, you can preheat the baking sheet before placing the pastries on it.
Gruyère is the gold standard for its nutty flavor and superior melting properties, but Swiss, Emmental, or a sharp White Cheddar also work beautifully for that gooey interior.
The most common reason is that the dough became too warm before baking. The butter must be cold to create steam and lift the layers. Also, avoid letting egg wash drip down the cut edges.
The Ultimate Ham and Cheese Puff Pastry Recipe
Ham and Cheese Puff Pastry: The Ultimate Flaky Triple-Layered Savory Squares
Ingredients
Equipment
Method
- Preheat oven to 400°F (200°C). Roll out chilled puff pastry and cut into 18 equal squares.
- For each stack, layer one pastry square, a nest of ham ribbons, and white cheese. Repeat for a second layer, then top with a third pastry square.
- Brush the top of each stack with whisked egg. Sprinkle with sesame seeds and dried herbs.
- Bake for 20-25 minutes until the edges are multi-layered and crisp, and the pastry is golden-brown.
Notes
Don't let egg wash drip down the cut sides or the pastry won't rise.
Final Thoughts: Elevate Your Savory Baking
Mastering the Ham and Cheese Puff Pastry is a gateway to endless savory baking possibilities. By focusing on the visual cues—the golden-brown hue, the toasted seeds, and the gooey white cheese—you ensure a result that is as beautiful as it is delicious. We invite you to share your creations with us! Follow our journey for more flaky inspirations on Pinterest and leave a comment below with your favorite cheese substitutions.