When it comes to finding Fun Family Dinner Ideas, nothing beats a dish that is as much fun to assemble as it is to eat. These pull-apart sliders are the quintessential crowd-pleaser, transforming simple pantry staples into a decadent, golden-brown masterpiece that kids and adults alike will obsess over. Imagine soft, pillowy rolls drenched in a glossy butter glaze, topped with toasted sesame seeds, and filled with mountains of oozing Swiss cheese.
The beauty of this recipe lies in its simplicity and its visual appeal. Using a weathered metal baking sheet gives these sliders a rustic, home-cooked charm that feels authentic and inviting. Whether you are hosting a game day, a busy weeknight meal, or a casual weekend gathering, these sliders are designed to be the center of attention.
In this guide, we will dive deep into the culinary science of the perfect slider. We will explore why certain ingredients are non-negotiable and how to achieve that professional, unedited food photography look right in your own kitchen. Let’s turn your kitchen into the heart of the home with these irresistible bites.
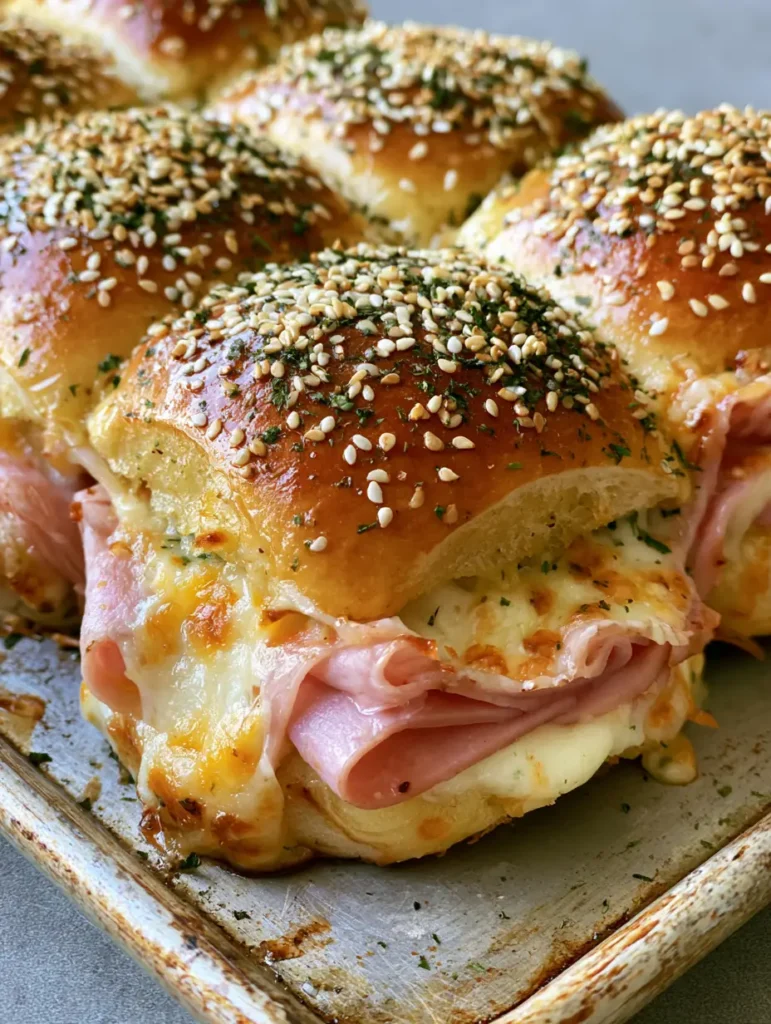
Why These Sliders Top Our Fun Family Dinner Ideas List
- Unbeatable Texture: The contrast between the toasted, golden-brown Hawaiian roll tops and the soft, steamed interior creates a multi-sensory eating experience.
- The Ooze Factor: Thick layers of Swiss cheese are baked until bubbly and slightly browned, specifically designed to ooze down the sides for that perfect “cheese pull.”
- The Savory-Sweet Balance: The natural sweetness of the Hawaiian rolls perfectly complements the salty, savory notes of the thinly sliced deli ham.
- Visual Masterpiece: Garnished with toasted white sesame seeds and fine dried parsley flakes, these look like they jumped straight off a professional food blog.
Essential Components for the Perfect Pull-Apart Experience
To execute this recipe at an elite level, we must look beyond just the “what” and focus on the “why.” Every ingredient plays a functional role in the structural integrity and flavor profile of the final dish.
The Foundation: Sweet Hawaiian Rolls
You need one 12-pack (340g) of golden-brown Hawaiian rolls. These rolls are high in sugar and fat, which allows them to caramelize quickly under the heat, providing that signature glossy, mahogany finish seen in our visual blueprint.
The Protein: Thinly Sliced Deli Ham
Use 1 lb (450g) of savory deli ham. It is crucial to fold the ham slices rather than laying them flat; this creates air pockets that trap heat and melt the cheese more efficiently, while also adding impressive vertical height to each slider.
The Melt: Thick Swiss Cheese Slices
We use 8-10 slices (approx. 225g) of Swiss cheese. Swiss is the gold standard here because of its lower melting point and nutty undertones. For the most Fun Family Dinner Ideas, you want that cheese bubbly and slightly browned on the edges.
The Signature Glaze: Melted Butter & Aromatics
1/2 cup (115g) of unsalted butter serves as our fat source. We also include “invisible” flavor enhancers like 1 tsp (5ml) of Worcestershire sauce and 1/2 tsp (2g) of onion powder to deepen the savory profile without altering the visual glaze. The visible stars, however, are the 1 tbsp (9g) of toasted white sesame seeds and 1 tsp (0.5g) of fine dried parsley flakes.
Necessary Tools for Culinary Success
Having the right equipment ensures you achieve the exact textures described in our visual recipe blueprint. You don’t need a professional kitchen, but a few specific items make a world of difference.
- Weathered Metal Baking Sheet: A darker, seasoned pan absorbs more heat, which helps brown the bottom of the rolls and crisps up any cheese that escapes.
- Serrated Bread Knife: This is essential for slicing the entire block of rolls in half horizontally without crushing the delicate crumb structure.
- Silicone Basting Brush: For an even, glossy application of the butter glaze that covers every nook and cranny.
- Aluminum Foil: Used for the initial phase of baking to ensure the cheese melts perfectly before the tops become too dark.

Step-by-Step Instructions: Mastering the Slider
Preparing the Roll Base
Preheat your oven to 350°F (175°C). Take your 12-pack of Hawaiian rolls and, without pulling them apart, use a serrated knife to slice the entire block in half horizontally. Place the bottom half on your weathered metal baking sheet. This creates a solid foundation for your layers of ham and cheese.
Layering for Maximum Flavor and Height
Begin by layering half of your Swiss cheese slices directly onto the bread. Next, take your thinly sliced deli ham and “ribbon” it across the cheese. Folding the ham adds volume and ensures every bite is substantial. Finish with the remaining cheese slices. This “cheese sandwich” technique locks the ham in place and creates that bubbly, oozing effect as it bakes.
Applying the Signature Glossy Glaze
In a small microwave-safe bowl, melt your butter. Whisk in your “invisible” seasonings (Worcestershire and onion powder). Replace the top half of the rolls. Using your basting brush, generously coat the tops and sides of the rolls with the butter mixture. Immediately sprinkle the toasted white sesame seeds and dried parsley flakes over the wet glaze so they adhere perfectly.
The Two-Stage Baking Process
Cover the sheet loosely with aluminum foil. This traps steam, softening the bread and melting the cheese. Bake for 10 minutes. Remove the foil and bake for an additional 8-12 minutes. Watch for the visual cue: the cheese should be bubbly and the tops should reach a deep, glossy golden-brown. You want to see the cheese slightly browned and oozing down the sides of the rolls, just like a professional smartphone food photo.
Expert Tips for the Ultimate Golden-Brown Finish
- The Foil Tent: Ensure the foil isn’t touching the cheese or the glaze. If it sticks, it will pull off that beautiful parsley and sesame garnish you worked so hard on.
- Don’t Skip the Rest: Let the sliders sit for 5 minutes after coming out of the oven. This allows the melted cheese to set slightly, making them much easier to pull apart without the fillings sliding out.
- Butter Quality: Use high-quality European-style butter if possible. The higher fat content results in a more vibrant, glossy sheen on the finished bread.
- Check Your Oven: Every oven has hot spots. Rotate your weathered metal baking sheet halfway through the un-foiled baking stage to ensure an even golden-brown color across all 12 sliders.
Storage, Reheating, and Make-Ahead Advice
While these are best served fresh and bubbly, you can store leftovers in an airtight container in the refrigerator for up to 3 days. To reheat and maintain the texture, avoid the microwave as it can make the Hawaiian rolls rubbery. Instead, wrap them in foil and place them in a 325°F (165°C) oven for 10 minutes, then uncover for 2 minutes to recrisp the tops.
For those looking for Fun Family Dinner Ideas that save time, you can assemble these sliders up to 24 hours in advance. Keep them covered in the fridge without the glaze, then add the butter and seeds right before you pop them into the oven.
Pairing Your Sliders: What to Serve
To turn these sliders into a full feast, consider the balance of your meal. Since the sliders are rich and savory, a bright, acidic side dish is the perfect companion. A crisp chickpea and black bean salad (coming soon) provides a refreshing crunch that cuts through the melted Swiss cheese.
If you’re leaning into the comfort food vibe, serving these alongside a bowl of garlic butter steak pasta can satisfy even the hungriest teenagers. For a truly decadent dipping experience, try serving a side of cowboy butter (coming soon) for those who want an extra hit of garlic and herbs. If you’re planning a full spread, these sliders are one of our favorite easy vacation meals because they require so little cleanup.
Frequently Asked Questions
Yes! You can assemble the rolls, ham, and cheese up to 24 hours in advance. Store them covered in the fridge and add the fresh butter glaze and sesame seeds right before baking.
While our visual blueprint specifically features toasted white sesame seeds for a nutty crunch, you can certainly substitute poppy seeds if that is what you have on hand, though the flavor profile will shift slightly.
The secret is layering the Swiss cheese so it hangs slightly over the edge of the rolls and using a two-stage baking process. The foil stage melts the cheese, while the uncovered stage allows it to bubble and flow.
To prevent soggy bottoms, use a weathered metal baking sheet which distributes heat evenly, and avoid adding too much moisture-heavy sauce inside the rolls. Baking uncovered for the last few minutes also helps crisp the base.
Keep the rolls connected in their original block and use a long serrated bread knife to slice through the middle horizontally. This ensures even layers and makes assembly much faster.
Recipe: Golden-Brown Ham and Swiss Hawaiian Sliders
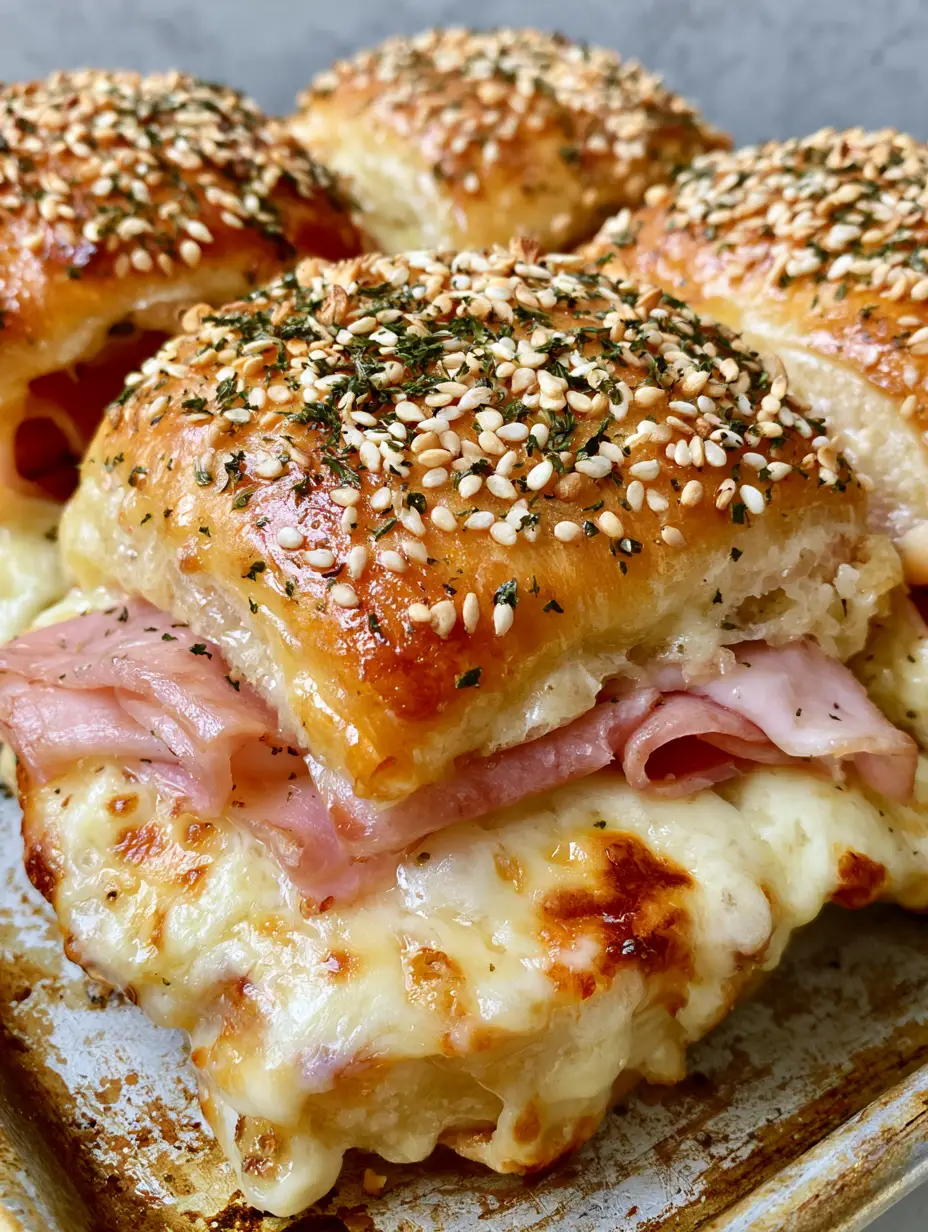
Fun Family Dinner Ideas: The Ultimate Cheesy Ham and Swiss Hawaiian Sliders
Ingredients
Equipment
Method
- Preheat oven to 350°F (175°C). Slice the entire block of Hawaiian rolls in half horizontally and place the bottom half on a weathered metal baking sheet.
- Layer half the Swiss cheese, then fold and ribbon the deli ham over the top. Add the remaining cheese slices on top of the ham.
- Replace the top of the rolls. Whisk melted butter with onion powder and Worcestershire sauce. Brush generously over the rolls, then sprinkle with toasted white sesame seeds and dried parsley flakes.
- Cover with foil and bake for 10 minutes. Remove foil and bake for another 8-12 minutes until the cheese is bubbly and the tops are golden-brown and glossy.
Notes
Use a serrated knife for the cleanest cuts.

Bring the Family Together with Every Bite
Creating Fun Family Dinner Ideas is all about finding recipes that bridge the gap between “easy to make” and “incredible to eat.” These Hawaiian roll sliders, with their toasted sesame seeds and oozing Swiss cheese, are a testament to how simple ingredients can create a world-class meal. The next time you need a win in the kitchen, reach for this recipe and watch how quickly they disappear.
Did your family love the “cheese ooze” as much as ours? We want to hear about it! Leave a comment below, and don’t forget to share your photos and tag us. For more mouth-watering inspiration, follow CrispCrumbs on Pinterest and save this recipe to your favorite dinner board!


