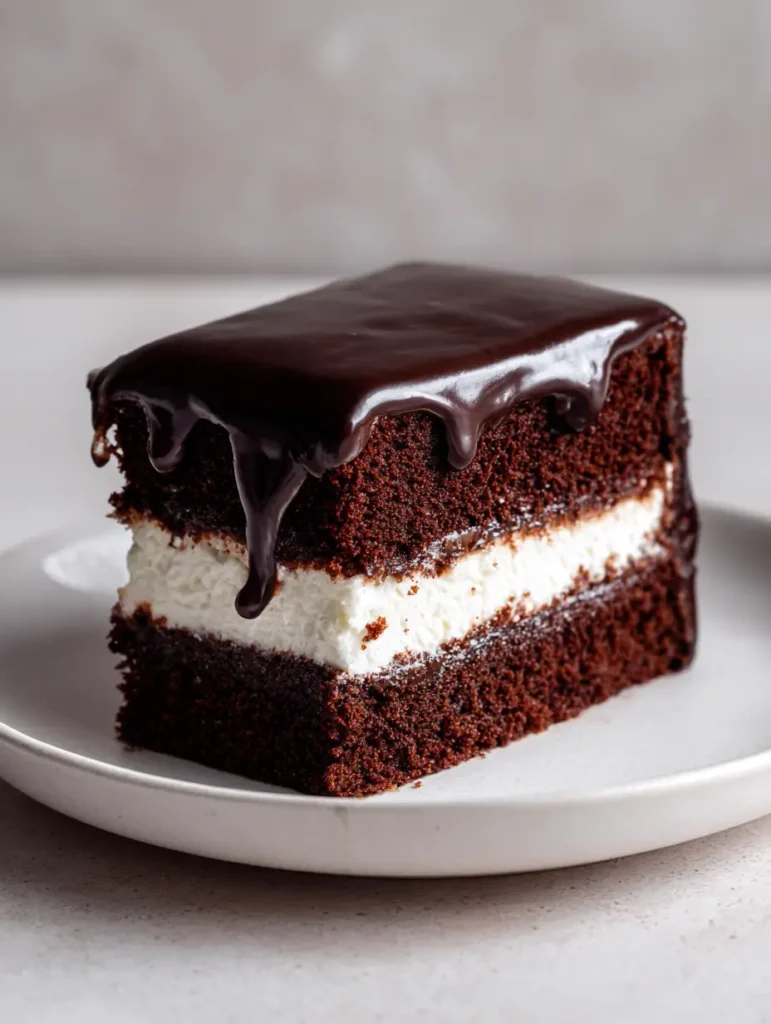
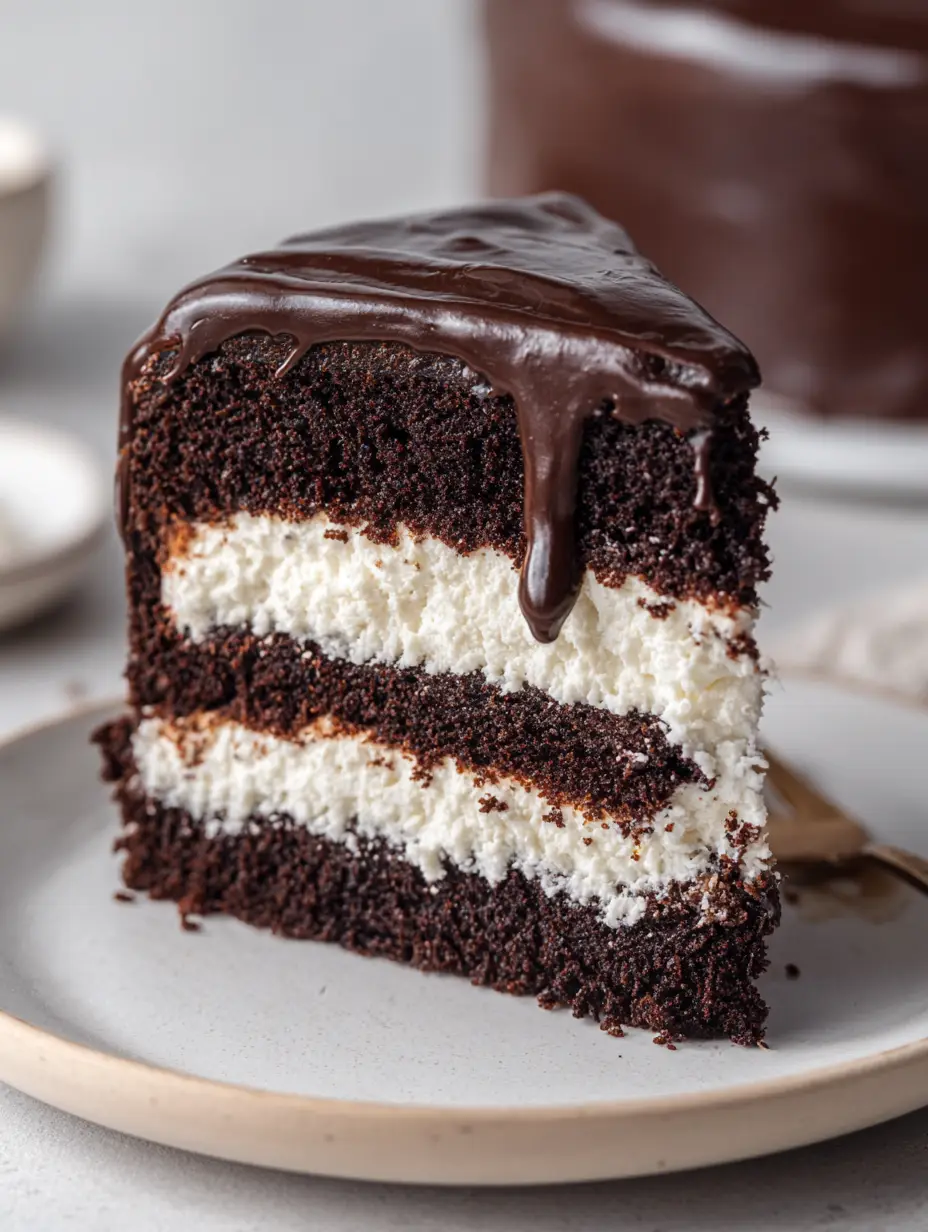
This Ding Dong Cake Recipe is the definitive answer for anyone craving that childhood lunchbox classic but elevated with professional culinary techniques. Imagine a cake that captures the soul of a snack cake but presents like a show-stopping centerpiece from a high-end bakery. We are talking about two layers of incredibly moist, fine-crumb dark chocolate sponge sandwiching a thick, snow-white marshmallow cream filling, all encased in a heavy, mirror-finish dark chocolate ganache.
The visual contrast is what defines this dessert: the obsidian-dark sponge against the brilliant white center creates a striking cross-section. In this guide, we will walk through the forensic details of achieving that perfect “drip” and the science of blooming cocoa to ensure your cake is as rich as it is beautiful. Whether you are serving this after a meal of spicy garlic beef croquettes (coming soon) or as a standalone celebration, it is guaranteed to impress.
Why This Homemade Snack Cake Is Structurally Superior
- The Crumb Architecture: Unlike dense pound cakes, this dark chocolate sponge uses a high-moisture oil-and-buttermilk base to ensure a fine, tender crumb that melts on the tongue.
- The Marshmallow Core: We use a stabilized marshmallow cream that holds its shape under the weight of the top layer without losing that iconic “cloud-like” texture.
- The Mirror Ganache: A precisely tempered ganache provides a glossy, heavy coating that stays soft enough to slice but firm enough to maintain those beautiful side drips.
- Visual Fidelity: This recipe is designed to perfectly replicate the handheld smartphone aesthetic—real, rustic, and undeniably decadent.
The Secret Ingredients for a Deep Dark Chocolate Crumb
To achieve the “moist dark chocolate cake layers” described in our blueprint, every ingredient serves a specific chemical purpose. We aren’t just mixing batter; we are building a structural masterpiece.
Dutch-Process Cocoa Powder (1 cup / 100g): Unlike natural cocoa, Dutch-process is treated with alkali, giving it a darker color and a smoother, more mellow chocolate flavor that is essential for that “Ding Dong” look. It provides the deep obsidian hue seen in the visual prompt.
Boiling Water (1 cup / 240ml): This is the “invisible” hero. Pouring boiling water over the cocoa “blooms” the powder, dissolving lumps and releasing the trapped flavor compounds for maximum intensity. It also thins the batter to create that fine-textured crumb.
Buttermilk (1 cup / 240ml): The acidity in buttermilk reacts with the baking soda to provide a superior lift, ensuring the layers are tall and airy rather than flat and heavy. It adds a subtle tang that balances the sweetness of the marshmallow.
Neutral Vegetable Oil (1/2 cup / 120ml): While butter adds flavor, oil is the key to a cake that stays moist for days. It prevents the starch in the flour from toughening, resulting in a velvety mouthfeel even when cold.
All-Purpose Flour (2 cups / 250g): This provides the necessary protein structure to hold the heavy marshmallow filling without collapsing. Always measure by weight if possible for consistent results.
Mastering the Snow-White Marshmallow Center
The “thick white marshmallow cream filling” requires more stability than a standard frosting. We achieve this by combining a traditional vanilla buttercream base with high-quality marshmallow fluff.
Unsalted Butter (1 cup / 225g): Softened to room temperature, this acts as the fatty carrier for the marshmallow flavor. Ensure it is whipped until it turns pale, almost white, before adding other ingredients.
Marshmallow Fluff (1 jar / 7.5oz / 213g): This provides the signature “pull” and nostalgic flavor profile. It is the primary ingredient for achieving that “bright white” look seen in the smartphone photo.
Powdered Sugar (2 cups / 240g): This acts as the stabilizer. It builds the “shoulders” of the filling so it doesn’t squish out the sides when you stack your dark chocolate layers.
The Science of the Glossy Dark Chocolate Ganache Glaze
For a ganache that appears “smooth and rich with slight drips,” the ratio of chocolate to cream is non-negotiable. We are looking for a 1:1 ratio by weight for the perfect pourable consistency.
Semi-Sweet or Bittersweet Chocolate (8oz / 225g): Use a high-quality bar rather than chips if possible. Bars contain less stabilizers, allowing for a smoother melt and a glossier finish on your Ding Dong Cake Recipe.
Heavy Whipping Cream (1 cup / 240ml): The high fat content (at least 36%) ensures the ganache remains “heavy” and opaque, covering the dark sponge completely without being translucent.
Light Corn Syrup (1 tbsp / 15ml): This is a professional baker’s secret. A small amount of corn syrup prevents the sugar in the chocolate from recrystallizing, ensuring a permanent “glossy” mirror finish.
Essential Equipment for Professional Results
To achieve the “tall slice” and “perfectly smooth” layers, you will need a few specific tools from your kitchen arsenal.
- Two 8-inch (20cm) Round Cake Pans: These provide the height necessary for the dramatic cross-section.
- Offset Spatula: Essential for smoothing the marshmallow filling to a “perfectly smooth layer” before adding the top sponge.
- Wire Cooling Rack: Allowing the cake to cool completely on a rack prevents the bottom from becoming soggy, which is vital for a “fine-crumb” result.
- Hand Mixer or Stand Mixer: To incorporate enough air into the marshmallow filling to keep it light and bright white.
Step-by-Step Instructions for the Perfect Ding Dong Cake
1. Preparing the Dark Chocolate Sponge Base
Preheat your oven to 350°F (175°C). Grease and flour two 8-inch pans, lining the bottoms with parchment paper. In a large bowl, whisk together the flour, sugar, cocoa powder, baking powder, baking soda, and salt.
Add the eggs, buttermilk, oil, and vanilla. Mix on medium speed until well combined. Gradually stream in the boiling water while mixing on low. The batter will be very thin—this is normal. Pour evenly into the pans and bake for 30-35 minutes.
Visual Cue: The cake is done when the edges begin to pull away slightly from the pan and a toothpick comes out with just a few moist crumbs attached. Let the layers cool completely before attempting to fill.

2. Engineering the Marshmallow Filling
In a clean bowl, beat the softened butter and powdered sugar until light and fluffy. This should take about 3-5 minutes of high-speed whipping. Add the marshmallow fluff and vanilla extract.
Continue to whip until the mixture is “bright white” and holds stiff peaks. If the mixture feels too soft, chill it for 10 minutes before spreading. This ensures the filling remains “thick” as specified in the blueprint.
3. The Pour-Over Ganache Technique
Finely chop your chocolate and place it in a heat-proof bowl. Heat the heavy cream and corn syrup in a small saucepan until it just begins to simmer (do not let it reach a rolling boil). Pour the hot cream over the chocolate.
Let it sit undisturbed for 5 minutes. This allows the heat to penetrate the chocolate evenly. Gently stir from the center outward until a “glossy dark chocolate” emulsion forms. Let it sit at room temperature for 10-15 minutes until it thickens slightly to a “heavy” pouring consistency.
4. Assembly and the “Drip” Effect
Place one cake layer on a serving plate. Spread the marshmallow filling in an even, 1-inch thick layer, stopping just 1/4 inch from the edge. Top with the second cake layer.
Pour the ganache slowly into the center of the top layer. Use your offset spatula to gently push the ganache toward the edges, allowing it to naturally fall over the sides in “slight drips.” This mimics the realistic food photography look of our Midjourney prompt.
Expert Tips for a Flawless Finish
- Level Your Cakes: Use a serrated knife to trim the rounded tops off your cake layers. This ensures the “thick white marshmallow” layer is perfectly flat and doesn’t bulge.
- The Crumb Coat: If you find the ganache is picking up crumbs, apply a very thin “crumb coat” of ganache or frosting first and chill for 20 minutes before the final pour.
- Temperature Control: Never fill a warm cake. The marshmallow cream will melt instantly, ruining the visual contrast.
- Clean Slices: For the “tall slice” look in the photo, dip your knife in hot water and wipe it clean between every single cut.
Storage and Make-Ahead Advice
This cake is exceptionally hardy due to the oil base. It can be stored in an airtight container at room temperature for up to 2 days. For longer storage, keep it in the refrigerator for up to 5 days.
If you choose to refrigerate, let the cake sit at room temperature for 30 minutes before serving. This allows the ganache to soften back to its “glossy” state and the sponge to regain its “moist” texture. You can also freeze the individual cake layers (wrapped tightly) for up to 3 months.
What to Serve With Your Homemade Ding Dong Cake
While this cake is a star on its own, it pairs beautifully with other homemade delights. If you are hosting a party, consider starting with something savory like Greek chicken flatbread or a fresh cucumber beetroot salad to balance the richness of the chocolate.
For a full dessert spread, these peach crumble bars offer a fruit-forward contrast to the deep cocoa. If you want to lean into the nostalgic theme, a side of Hawaiian pineapple coconut fluff adds a tropical creamy element to your dessert table.
Frequently Asked Questions
No, marshmallow fluff alone is too fluid and will cause the top layer of the cake to slide off. It must be whipped with butter and powdered sugar to create a stable, stackable cream.
Because of the butter in the filling and the cream in the ganache, it is best stored in the fridge if keeping for more than 48 hours. Always bring to room temperature before serving for the best texture.
Ensure your cake layers are completely cold and use a stabilized filling made of whipped butter, powdered sugar, and marshmallow fluff. Chilling the filling for 10 minutes before assembly also helps.
Dutch-process cocoa powder is essential. It provides the characteristic dark obsidian color and a smooth, non-acidic chocolate flavor that matches the original snack cake profile.
A lack of gloss usually means the emulsion didn’t form correctly or the chocolate was overheated. Adding a tablespoon of light corn syrup ensures a permanent, professional mirror shine.
The Ultimate Ding Dong Cake Recipe
Ding Dong Cake Recipe: The Ultimate Homemade Dark Chocolate Nostalgia Cake
Ingredients
Equipment
Method
- Whisk flour, sugar, cocoa, baking powder, and soda in a large bowl.
- Add wet ingredients and finish by streaming in boiling water; mix until a smooth, thin batter forms.
- Whip butter, sugar, and fluff until bright white; spread a thick layer over the first cooled sponge.
- Pour the warm, glossy ganache over the top, letting it drip naturally down the sides.
Notes
Use high-quality Dutch-process cocoa for the deepest dark chocolate color.
Join the CrispCrumbs Community!
This Ding Dong Cake Recipe is more than just a dessert; it is a trip back in time executed with modern culinary precision. We hope you enjoy the process of blooming your cocoa and watching that glossy ganache drip down the sides of your masterpiece. If you make this, we would love to see your results!
Leave a comment below with your experience, and don’t forget to follow us on Pinterest for more visually stunning recipes. Sign up for our newsletter to get the latest “Forensic Recipe” guides delivered straight to your inbox. Happy baking!


