There is a specific kind of culinary magic that happens when nostalgic pantry staples meet professional pastry techniques. This Chocolate Pudding Frosting is the embodiment of that synergy, delivering a texture that is remarkably light, airy, and reminiscent of a high-end chocolate mousse. Unlike traditional American buttercreams that can often feel heavy or cloying, this recipe utilizes the stabilizing power of instant pudding to create a structural masterpiece that remains soft on the palate.
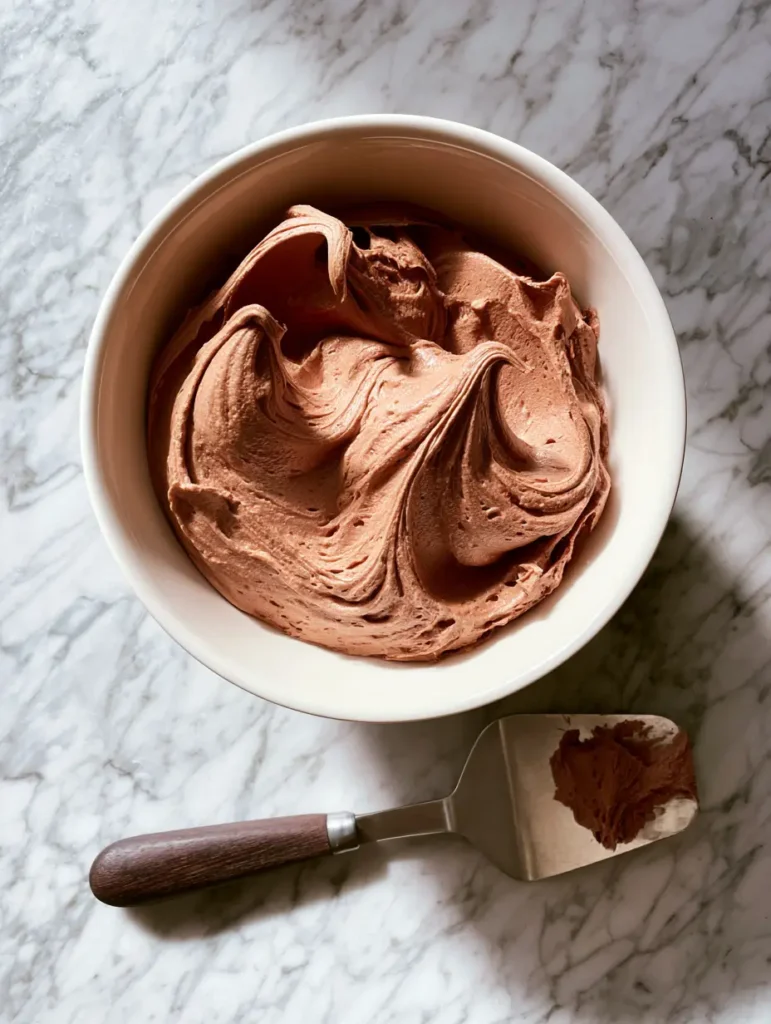
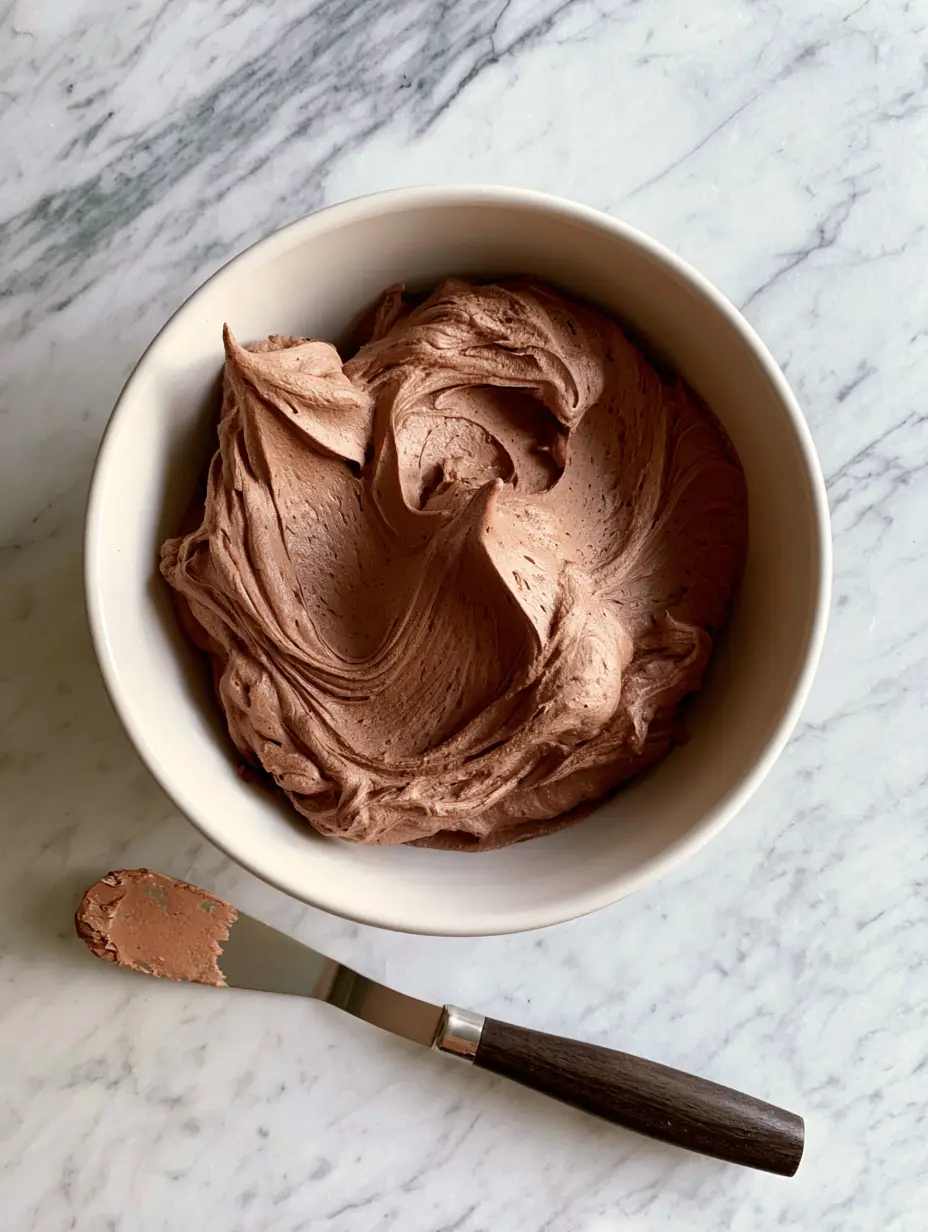
When you look at a bowl of this frosting, you aren’t just looking at a topping; you are looking at a carefully aerated emulsion. The visual hallmark of this recipe is its light brown, cocoa-rich hue and those iconic, deep sculpted swirl patterns that hold their shape with architectural precision. Whether you are swirling it onto a cupcake or smoothing it over a layered cake, the results are consistently professional.
Why This Whipped Pudding Frosting Is a Game-Changer
- The Aerated Mousse Texture: By carefully controlling the whipping process, we achieve a texture that feels like a cloud but behaves like a heavy-duty frosting.
- Unparalleled Stability: Thanks to the modified cornstarch in the pudding mix, this frosting holds “soft peaks” and deep swirls without weeping or melting at room temperature.
- Perfect Visual Appeal: This recipe is designed to look stunning in a white ceramic bowl, showcasing thick swirls and a smooth, matte finish that catches natural daylight beautifully.
- Balanced Sweetness: The addition of salt and high-quality cocoa powder cuts through the sugar, making it the perfect companion for a rich No-Bake Banana Pudding inspired dessert spread.
The Science Behind Our Key Ingredients
To achieve the visual result of “thick aerated swirls” on a “white marble surface,” we must select ingredients that provide both lift and density. Here is what you will need for this Chocolate Pudding Frosting:
Instant Chocolate Pudding Mix: 1 package (3.9 oz / 110g). This is our primary stabilizer, providing the thickening agents necessary to keep the swirls from collapsing.
Cold Whole Milk: 1 cup (240ml). The high fat content in whole milk is essential for a creamy mouthfeel and helps the pudding mix hydrate properly before it is incorporated into the butter.
Unsalted Butter (Softened): 1 cup (226g / 2 sticks). Butter provides the “body” of the frosting. It must be at exactly 65°F (18°C) to ensure it creams into a light brown, aerated state without becoming greasy.
Powdered Sugar: 2 cups (240g). Sifted sugar adds the necessary sweetness and contributes to the structural integrity required for “deep, sculpted swirl patterns.”
Unsweetened Cocoa Powder: 2 tbsp (15g). This intensifies the chocolate flavor and provides the matte, light brown finish seen in the “Visual Recipe Blueprint.”
Heavy Whipping Cream: 2 tbsp (30ml). This optional addition is the secret to achieving that “handheld smartphone photo aesthetic” softness, allowing the spatula to glide through the frosting easily.
Fine Sea Salt: ¼ tsp (1.5g). Salt is a foundational “invisible” ingredient that brightens the chocolate notes and balances the richness of the fats.
Essential Tools for Sculpting Perfection
To recreate the exact look of our Midjourney prompt, you will need a few specific items. A white ceramic bowl provides the clean, high-contrast background that makes the chocolate tones pop.
The most important tool in your arsenal, however, is a metal offset spatula with a dark wooden handle. The flexibility of the metal blade allows you to create the “deep, sculpted swirl patterns” by applying varying pressure as you rotate the bowl. Finally, a stand mixer or a powerful hand mixer is non-negotiable for achieving the “mousse-like texture.”
Step-by-Step Instructions for the Perfect Chocolate Pudding Frosting
Hydrating the Pudding Base
In a medium-sized bowl, whisk together the instant chocolate pudding mix and the 1 cup (240ml) of cold whole milk. Continue whisking for 2 minutes until the mixture begins to thicken into a dense, glossy paste.
Place this mixture in the refrigerator for at least 5-10 minutes. This “resting phase” allows the starches to fully hydrate, ensuring your final Chocolate Pudding Frosting is completely smooth without any graininess.
Creaming for Maximum Aeration
In the bowl of your stand mixer, beat the 1 cup (226g) of softened butter on medium-high speed. You are looking for a specific sensory cue: the butter should turn from a deep yellow to a very pale ivory color.
Add the sifted powdered sugar, cocoa powder, and sea salt. Start the mixer on low to avoid a “sugar cloud,” then increase to high and beat for 3-4 minutes until the mixture is incredibly fluffy and doubled in volume.
The Final Emulsion and Sculpting
Reduce the mixer speed to medium and add the chilled pudding mixture one tablespoon at a time. This gradual addition prevents the emulsion from breaking and ensures the “aerated mousse-like texture” is maintained.
Once all the pudding is incorporated, add the heavy cream and whip on high for one final minute. You will see the frosting transition to a light brown shade with a beautiful sheen.

Creating the Signature Swirls
Transfer the frosting to a clean white ceramic bowl. Using your metal offset spatula, press the tip of the blade into the center of the frosting and rotatate the bowl while pulling the spatula outward in a spiral motion.
This technique creates the “soft peaks” and “deep swirls” described in our visual blueprint. For the most authentic look, leave a small “smudge” of frosting on the blade of the spatula and rest it on your white marble surface next to the bowl.
Expert Tips for Visual and Culinary Success
- Temperature Control: If your kitchen is too warm, the frosting may lose its “sculpted” look. Chill the bowl for 10 minutes before serving to firm up those peaks.
- Sift Your Dry Goods: Cocoa powder is notoriously prone to clumping. Sifting it with the powdered sugar is the only way to ensure the “smooth” texture shown in the handheld smartphone photo.
- The “Paddle” vs “Whisk”: Use the paddle attachment for stability, but if you want an even more “aerated” result, finish the last minute of mixing with the whisk attachment.
- Avoid Over-Mixing: Once the “mousse-like” consistency is reached, stop. Over-mixing can introduce too many air bubbles, leading to a “pock-marked” appearance rather than a smooth finish.
Pairing Suggestions and Serving Ideas
This frosting is incredibly versatile. It is robust enough to layer inside a cake after a hearty meal of Baked Beef and Ricotta Stuffed Shells, yet light enough to serve as a dip for fruit.
If you are hosting a brunch, try serving it alongside an Ambrosia Fruit Salad for a decadent contrast. It also pairs beautifully as a filling for chocolate eclairs or as a topping for a refined Creamy Chicken Bowtie Pasta dinner’s dessert finale.
Frequently Asked Questions
No, this recipe specifically requires instant pudding mix. The thickening agents in instant pudding react with cold milk to provide immediate stability, whereas cook-and-serve requires heat to activate and will result in a runny frosting.
Because it contains milk and butter, it is best to store the frosting in the refrigerator. However, it can safely sit out at room temperature for 4-6 hours once applied to a cake or cupcakes.
The light brown color is a result of aeration. By whipping the butter and sugar for several minutes before adding the chocolate pudding, you incorporate air which lightens the dark cocoa tones into a beautiful light brown mousse shade.
Yes! Thanks to the modified cornstarch in the pudding mix, this frosting is remarkably stable. However, for tiered cakes, ensure the cake layers are completely cool and consider chilling the frosted cake before transport.
Graininess usually occurs if the powdered sugar wasn’t sifted or if the pudding mix wasn’t allowed to hydrate fully in the milk before being added to the butter. Ensure you whisk the pudding base for a full 2 minutes and let it rest.
The Ultimate Chocolate Pudding Frosting Recipe Card
Chocolate Pudding Frosting: The Ultimate Whipped Mousse-Like Buttercream
Ingredients
Equipment
Method
- In a medium bowl, whisk the instant pudding mix and cold milk for 2 minutes until thick. Refrigerate for 10 minutes.
- Beat softened butter, powdered sugar, cocoa, and salt in a stand mixer on high for 4 minutes until light and ivory-brown.
- Add the chilled pudding to the butter mixture one tablespoon at a time while beating on medium speed.
- Add heavy cream and whip on high for 1 minute until a mousse-like texture with soft peaks forms.
- Transfer to a white ceramic bowl and use a metal offset spatula to create deep sculpted swirl patterns.
Notes
Always sift your cocoa powder to avoid unsightly lumps in the smooth finish.
Storage and Make-Ahead Instructions
This Chocolate Pudding Frosting can be made up to 3 days in advance. Store it in an airtight container in the refrigerator. When you are ready to use it, let it sit at room temperature for 20 minutes, then give it a quick whip with a hand mixer to restore the “aerated swirls.”
We do not recommend freezing this frosting, as the cornstarch in the pudding mix can change texture upon thawing, losing that signature mousse-like quality. Always serve at a cool room temperature for the best sensory experience.
Closing & Call to Action
Achieving the perfect Chocolate Pudding Frosting is about more than just mixing ingredients; it’s about capturing a specific texture and visual elegance. We hope this guide helps you create the thick, aerated swirls and soft peaks that make this recipe a standout for any occasion. If you enjoyed this recipe, please leave a comment below and share your creations with us! Don’t forget to pin this recipe to your favorite boards on Pinterest for your next baking project.


