There is nothing quite as breathtaking as a tall, stately slice of cake that reveals perfectly even, aerated layers when cut. This professional-grade Chocolate Mousse Cake Filling is the key to achieving that elusive “light-as-air” texture while maintaining the structural integrity needed for multi-tiered masterpieces.
Inspired by the most decadent patisserie windows, this recipe delivers a light brown, aerated mousse that contrasts beautifully against a moist dark chocolate sponge. Whether you are building a celebratory centerpiece or simply want to elevate your weekend baking, this filling provides the stability of a ganache with the ethereal mouthfeel of a classic French mousse.
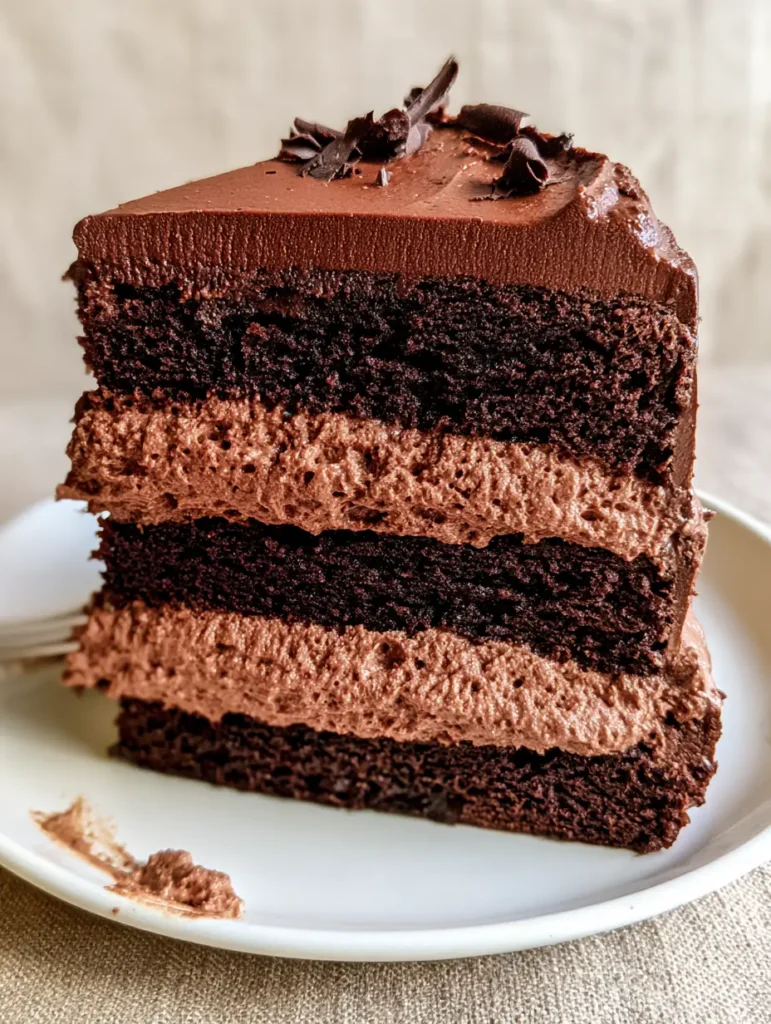
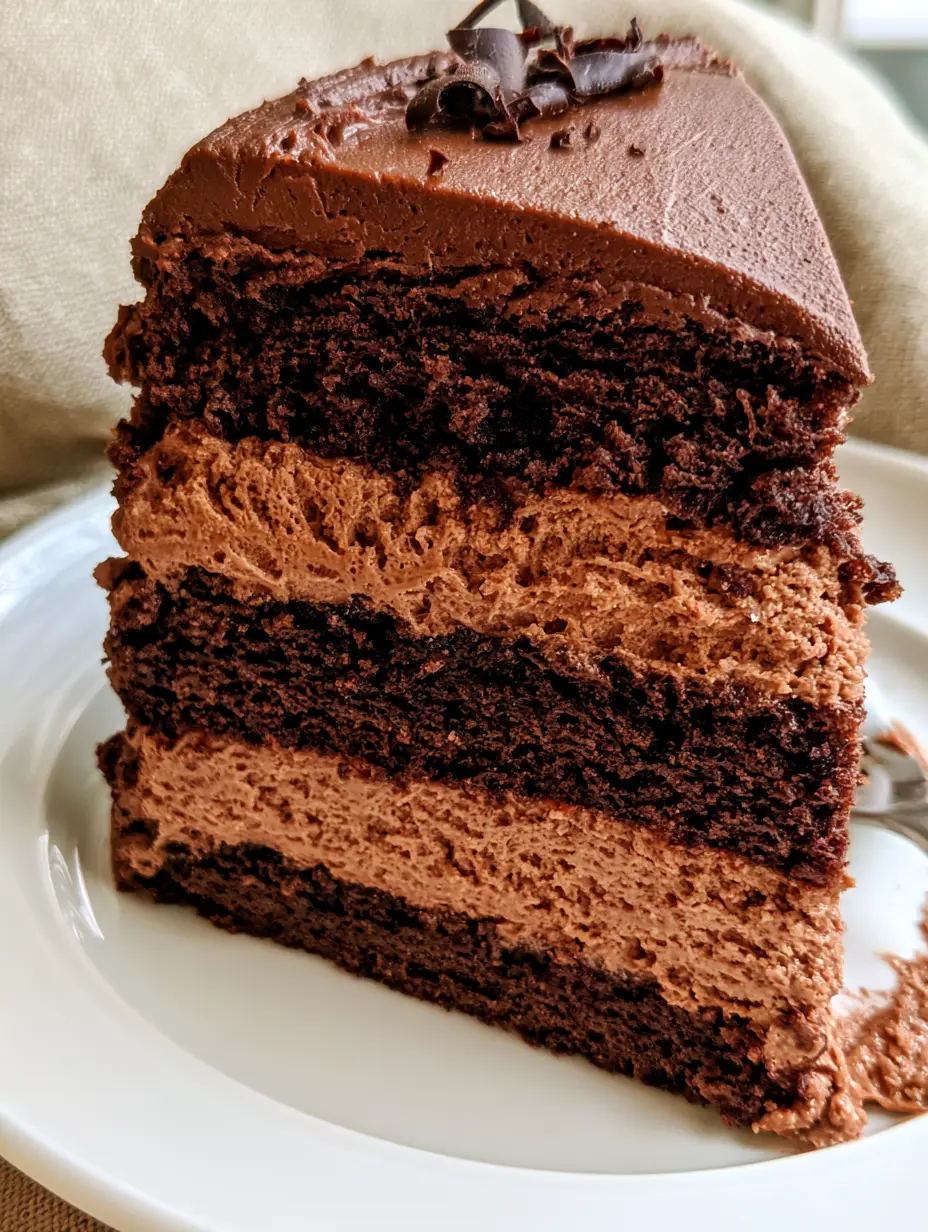
Imagine sliding your fork through a smooth, matte chocolate frosting, hitting a delicate dark chocolate curl, and then sinking into a cloud of whipped chocolate. The tiny air bubbles visible in the mousse layers are not just for show; they provide a lightness that balances the rich, moist crumb of the chocolate cake below.
Why This Silky Chocolate Mousse Cake Filling Changes Everything
- Aerated Structural Integrity: Unlike standard whipped creams, this filling uses a stabilized base to ensure your cake layers don’t slide or compress.
- Visual Contrast: The light brown hue of the mousse creates a stunning visual “stripe” effect against deep, dark chocolate sponge layers.
- Perfect Flavor Balance: By controlling the cocoa percentages, we achieve a filling that is intensely chocolatey without being cloyingly sweet.
- Professional Finish: Designed to work in tandem with a matte frosting, this recipe ensures your cake looks as good on a ceramic plate as it does in a high-end food magazine.
Essential Components for the Perfect Aerated Texture
To achieve the specific “tiny air bubble” texture seen in our visual blueprint, we must select ingredients that favor aeration and stability. Each element serves a scientific purpose in the final architecture of the cake.
Heavy Whipping Cream (480ml / 2 cups): This is the primary engine of our mousse. High fat content (at least 36%) is required to trap the air bubbles that create that signature light brown, fluffy texture.
Semi-Sweet Chocolate (170g / 6oz): Using a bar with 55-60% cacao provides the perfect “light brown” color for the mousse while ensuring it sets firmly enough to support the weight of the sponge.
Unflavored Gelatin (1 tsp / 5g): This is our “invisible” foundational ingredient. It provides the structural “bloom” necessary for the mousse to hold its height between heavy cake layers without oozing out the sides.
Dutch-Processed Cocoa Powder (3 tbsp / 25g): We use this in the sponge and a touch in the filling to deepen the flavor profile. It provides that “dark chocolate sponge” visual that contrasts so well with the lighter mousse.
Boiling Water (2 tbsp / 30ml): Used to bloom the cocoa and dissolve the gelatin. This ensures there are no gritty textures in your otherwise smooth, matte finish.
Dark Chocolate Block (for curls): A high-quality dark chocolate bar kept at room temperature is essential for shaving those delicate, professional dark chocolate curls for the topping.
Tools of the Trade for Sky-High Cake Layers
To replicate the handheld smartphone photo of a tall slice, you need more than just ingredients; you need the right precision tools. Achieving those even, thick layers of mousse requires controlled application.
First, an electric stand mixer or hand mixer is non-negotiable for achieving the aerated, whipped texture. You are looking for stiff peaks that still retain a supple, matte sheen.
An offset spatula is your best friend for spreading the mousse into those even, thick layers. To get the “matte chocolate frosting” look, you will also need a bench scraper to smooth the exterior of the cake.
Finally, consider using acetate cake collars if you are aiming for perfectly vertical sides. These help the mousse set in a perfect circle before the frosting is applied.

Step-by-Step: Crafting Your Chocolate Masterpiece
Preparing the Moist Dark Chocolate Sponge
The foundation of this dish is the dark chocolate sponge. To ensure it stays moist, we use a combination of oil and buttermilk. Sift your dry ingredients, including the Dutch-processed cocoa, to avoid lumps.
Bake your layers and allow them to cool completely. A warm cake will melt your Chocolate Mousse Cake Filling instantly, destroying the aerated bubbles you worked so hard to create. If you have leftovers, they go great with oatmeal chocolate chip cookies for a dessert platter.
Creating the Aerated Mousse Filling
Start by blooming your gelatin in cold water, then dissolving it in a small amount of hot chocolate base. Melt your semi-sweet chocolate gently using a double boiler until smooth and glossy.
Fold the melted chocolate into your softly whipped cream. This is the critical moment: use a wide rubber spatula and a “cut and fold” motion. You want to see those tiny air bubbles remaining in the mixture—this is what gives the “light brown” mousse its characteristic fluffiness.
Assembling the Triple Layer Slice
Place your first layer of moist dark chocolate sponge on a plate. Pipe a “dam” of matte frosting around the edge to hold the mousse in place. Fill the center with a thick, even layer of the chocolate mousse.
Repeat this process for the second layer. When you place the final sponge on top, press down very gently. You want the mousse to be visible and thick, just like the “two thick, even layers” described in our visual guide. If you enjoy this assembly style, you might also love the layering in a Boston cream pie poke cake.
The Matte Frosting and Chocolate Curls
For the matte finish, use a frosting with a high cocoa-to-butter ratio. Avoid excess corn syrup or liquid sweeteners which add shine. Smooth the top with your offset spatula until it is perfectly flat.
For the finishing touch, take your room-temperature dark chocolate bar and a vegetable peeler. Draw the peeler along the edge of the bar to create delicate curls. Place a few in the center of the cake for that professional, handheld photo look.
Pro Tips for a Flawless Matte Finish
- Temperature Control: Ensure your chocolate curls are handled with a toothpick or fork. The heat from your fingers will melt the delicate edges instantly.
- The “Smear” Factor: To get that realistic “mousse smeared on the plate” look for photography, use a chilled fork to take one clean bite and pull it slightly across the ceramic.
- Stabilization: If you are making this in a warm climate, increase the gelatin by 1/2 teaspoon to ensure the mousse doesn’t lose its “aerated” look.
- Don’t Over-mix: Once the chocolate is incorporated into the cream, stop. Over-mixing will turn your fluffy mousse into a dense, grainy ganache.
Keep Your Cake Fresh: Storage and Thawing Guide
Because this cake contains real dairy and stabilized mousse, it must be kept refrigerated. It will stay fresh and moist for up to 4 days if kept in an airtight cake carrier.
For the best texture, remove the cake from the fridge about 20 minutes before serving. This allows the sponge to soften slightly while the Chocolate Mousse Cake Filling remains cool and aerated.
You can freeze individual slices by wrapping them tightly in plastic wrap and then foil. Thaw in the refrigerator overnight to maintain the integrity of the mousse air bubbles. This is much more delicate than a strawberry shortcake sheet cake, which handles freezing slightly differently.
Sweet Pairings and Serving Suggestions
This cake is an intense chocolate experience. To balance the richness, serve it with something bright or salty. A side of fresh raspberries or a dollop of unsweetened whipped cream works beautifully.
If you are hosting a larger dessert party, this cake pairs exceptionally well with other textures. Consider serving it alongside Dubai chocolate cake for a study in chocolate textures, or even a fresh peach cake to provide a fruity contrast.
For those looking for a lighter option on the side, a high-protein chocolate mousse can satisfy the chocolate craving with fewer calories, allowing you to enjoy a larger slice of the main cake!
Common Questions About Filling Layer Cakes
Yes, but milk chocolate has a lower cocoa butter content and more sugar, so you may need to increase the gelatin slightly to ensure it sets firmly enough for a tall layer cake.
The light brown color comes from the aeration process. As you whip air into the chocolate and cream mixture, the color lightens naturally. Using a 55-60% cocoa chocolate also helps achieve this specific hue.
The secret is using a small amount of unflavored gelatin bloomed in water. This provides the structural integrity needed to support heavy sponge layers without sacrificing the airy texture.
For the cleanest slices where the mousse layers remain perfectly even, chill the assembled cake for at least 4 hours, or ideally overnight, before cutting.
Graininess usually occurs if the melted chocolate is too cold when added to the whipped cream, causing it to seize, or if the cream is over-whipped. Ensure your chocolate is fluid but not hot.
The Ultimate Chocolate Mousse Cake Filling Recipe
Chocolate Mousse Cake Filling: The Secret to Professional Bakery-Style Layers
Ingredients
Equipment
Method
- Sprinkle the unflavored gelatin over cold water and let sit for 5 minutes. Microwave for 10 seconds until fully dissolved.
- Whip the heavy cream to soft peaks. Gently fold in the melted semi-sweet chocolate and dissolved gelatin until the mousse is a light brown color with visible tiny air bubbles.
- Place a layer of dark chocolate sponge on a plate. Spread a thick, even layer of mousse on top. Repeat for three layers of sponge and two layers of filling.
- Coat the exterior with a smooth, matte chocolate frosting. Top with delicate dark chocolate curls.
Notes
Use a warm vegetable peeler for the smoothest chocolate curls.
Bring This Professional Chocolate Mousse Cake to Your Kitchen
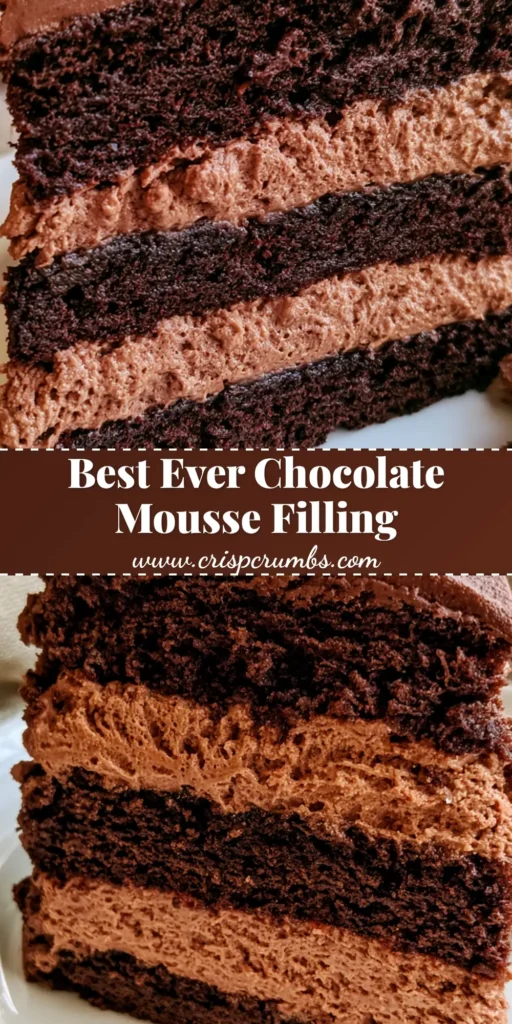
Creating a cake that looks like it belongs on a professional blog is all about the details—the aeration of the mousse, the moisture of the sponge, and the matte finish of the frosting. This Chocolate Mousse Cake Filling is the bridge between amateur baking and professional pastry arts.
We invite you to try this recipe and see the difference that a stabilized, aerated filling makes. Did your mousse show those beautiful tiny air bubbles? Did you master the dark chocolate curls?
Leave a comment below and let us know how your cake turned out! Don’t forget to share your tall-slice photos with us on Pinterest and join our community of enthusiastic home cooks.


