There is a specific kind of culinary magic that happens when high-heat searing meets the bright, acidic punch of citrus. This Chicken Piccata Recipe isn’t just a meal; it is a masterclass in balance, texture, and visual elegance that transforms humble chicken breasts into a restaurant-quality centerpiece.
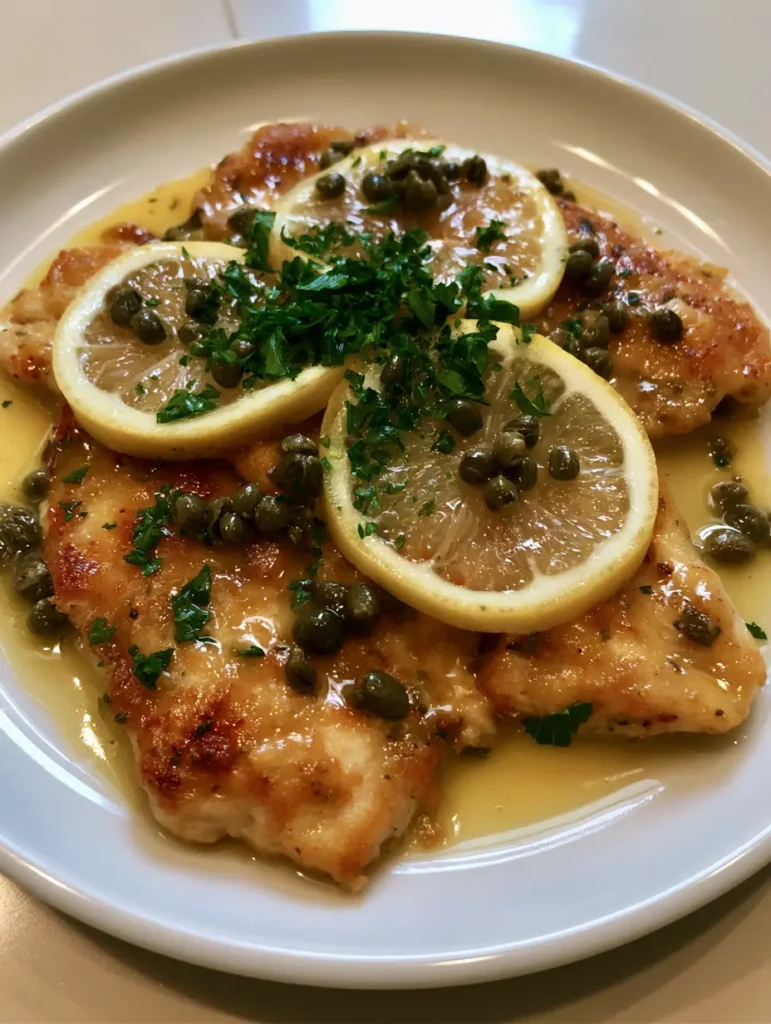
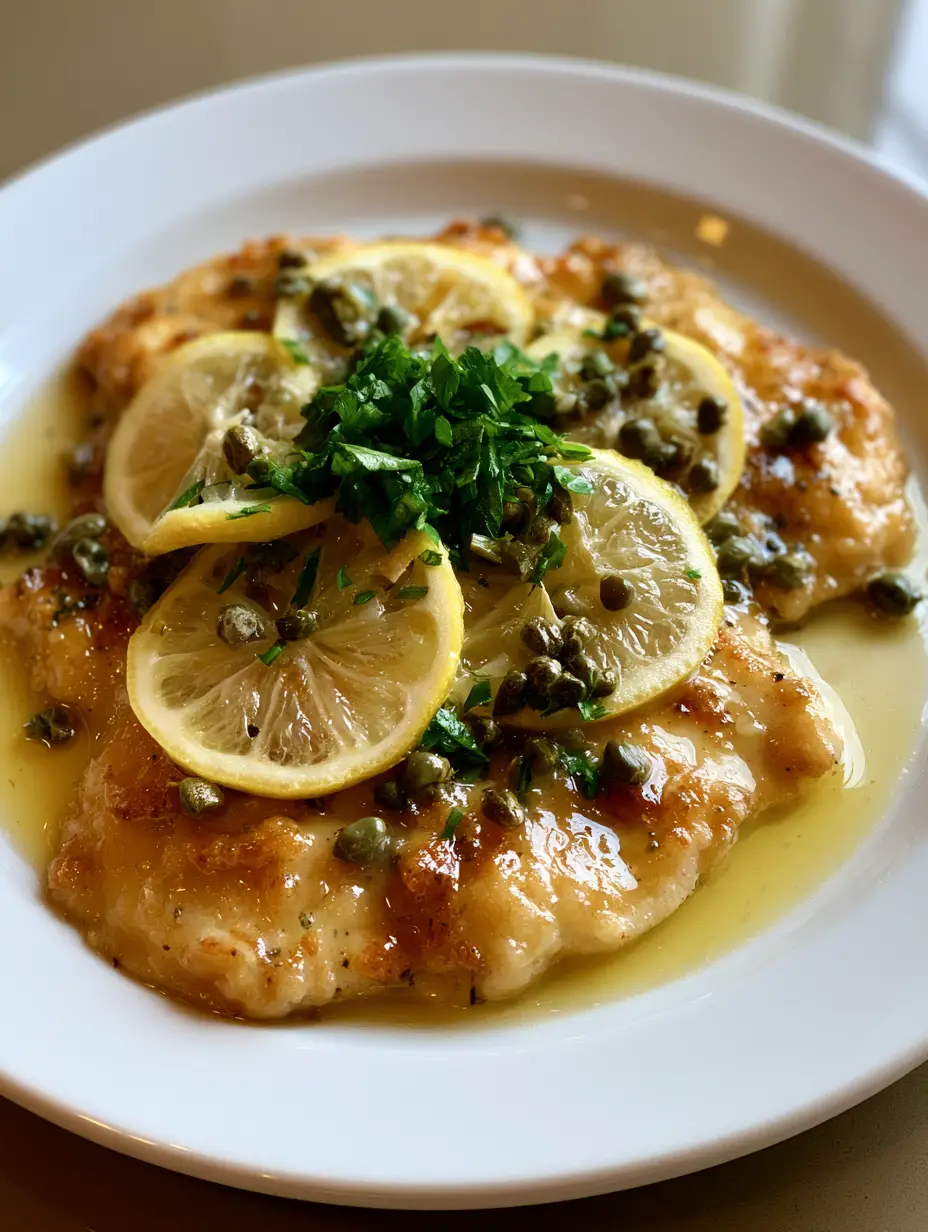
When you look at a plate of perfectly executed Piccata, you should see thin, golden-brown cutlets bathed in a sauce so glossy it reflects the light. The vibrant yellow of fresh lemon wheels and the deep, brined green of Mediterranean capers provide a color contrast that is as appetizing as it is beautiful.
In this guide, we are diving deep into the forensic details of this dish. We will explore the science of the Maillard reaction for that perfect crust and the physics of emulsification to ensure your lemon-butter sauce never breaks. Get ready to elevate your weeknight dinner rotation forever.
Why This Specific Chicken Piccata Recipe Wins Every Time
- Visual Brilliance: The contrast between the seared golden-brown chicken and the bright green parsley creates a stunning professional presentation.
- Textural Harmony: You get a crisp, dredged exterior that yields to a tender, juicy interior, all brought together by a silky, velvety sauce.
- Flavor Complexity: The sauce balances the sharp acidity of lemon, the salty pop of brined capers, and the rich, fatty finish of high-quality butter.
- Efficiency: Despite its sophisticated appearance, this dish comes together in under 30 minutes, making it perfect for both entertaining and busy evenings.
The Anatomy of a Perfect Chicken Piccata: Ingredients and Substitutions
The success of this Chicken Piccata Recipe relies heavily on the quality of your components. Because the ingredient list is relatively short, every element must be prepared with precision and intent.
Boneless Skinless Chicken Breasts (approx. 1.5 lbs / 680g): These must be sliced and pounded thin to ensure they cook quickly without drying out. Pounding the meat also breaks down muscle fibers, resulting in a much more tender bite.
All-Purpose Flour (1/2 cup / 60g): Used for dredging, the flour provides the necessary starch to create a golden crust and helps thicken the sauce later. Season this flour generously with salt and pepper for foundational flavor.
Unsalted Butter (4 tbsp / 60g): We use unsalted butter to control the sodium levels, adding it at the end to create a glossy emulsion. It provides the “mouthfeel” that distinguishes a great piccata from a mediocre one.
Dry White Wine (1/3 cup / 80ml): A crisp Pinot Grigio or Sauvignon Blanc works best to deglaze the pan and add depth. If you prefer to cook without alcohol, a high-quality chicken stock with a splash of white wine vinegar is an excellent substitute.
Fresh Lemon Juice (1/4 cup / 60ml) & Lemon Wheels: The acidity cuts through the richness of the butter and chicken fat. The lemon wheels are not just a garnish; they soften in the sauce and release essential oils from the zest.
Non-Pareil Capers (3 tbsp / 45g): These small, brined flower buds provide a salty, tangy explosion of flavor. Ensure they are drained well before adding to the pan to prevent splattering.
Fresh Flat-Leaf Parsley (1/4 cup / 15g): Finely chopped parsley adds a burst of “green” freshness that lifts the entire dish. Always use fresh parsley; dried simply won’t provide the same aromatic impact.
Extra Virgin Olive Oil (2 tbsp / 30ml): We use olive oil for the initial sear because it has a higher smoke point than butter, allowing us to achieve that golden-brown color without burning the solids.
Essential Tools for Achieving Professional Results
To recreate the exact visual result seen in our photos, you will need a few specific tools. Having the right gear ensures the techniques, like searing and emulsifying, work as intended.
A heavy-bottomed stainless steel or cast-iron skillet is non-negotiable for this Chicken Piccata Recipe. These materials hold heat better than non-stick pans, which is crucial for developing the “fond” (those little brown bits at the bottom of the pan) that forms the base of your sauce.
You will also need a meat mallet for pounding the chicken cutlets to a uniform thickness of about 1/4 inch (6mm). This ensures every piece of chicken finishes cooking at the exact same time, preventing the smaller pieces from becoming tough and rubbery.
Mastering the Technique: Step-by-Step Instructions
Step 1: Preparing the Chicken Cutlets
Start by slicing your chicken breasts horizontally to create thinner fillets. Place them between two sheets of plastic wrap and use the flat side of a meat mallet to pound them until they are 1/4 inch (6mm) thick.
Season the cutlets on both sides with kosher salt and freshly cracked black pepper. If you are looking for more protein-heavy inspiration for the week, you might also enjoy learning how to prep the meat for a Chinese beef stir fry.
Step 2: The Dredging Process
Place your flour in a shallow dish. Lightly coat each chicken cutlet in the flour, shaking off the absolute excess. You want a translucent coating, not a heavy batter; this is what creates that delicate, golden-brown skin seen in the visual prompt.
Step 3: Searing for Maximum Flavor
Heat the olive oil and 1 tablespoon (15g) of butter in your skillet over medium-high heat. Once the butter is foaming and the oil is shimmering, add the chicken cutlets in a single layer. Do not crowd the pan; work in batches if necessary.
Cook for 3-4 minutes per side. Look for the sensory cue: a deep, golden-brown crust and a firm bounce when touched. Remove the chicken to a plate and tent it loosely with foil to keep it warm.

Step 4: Building the Glossy Lemon Butter Sauce
Lower the heat to medium and pour the white wine (or stock) into the hot skillet. Use a wooden spoon to scrape up all the browned bits (the fond) from the bottom. This is where the concentrated flavor lives.
Add the lemon juice, lemon wheels, and capers. Let the liquid simmer and reduce by half. This concentration of flavor is essential for a sauce that coats the back of a spoon.
Step 5: The Secret to the Emulsion
Turn the heat to low. Whisk in the remaining cold butter, one tablespoon at a time. By using cold butter and low heat, you create an emulsion—a stable mixture of fats and liquids—that results in a glossy, light yellow sauce that won’t separate.
Step 6: The Final Assembly
Return the chicken cutlets to the pan for just 60 seconds to coat them in the sauce. The chicken should look glazed and shimmering. Garnish with a generous scattering of finely chopped parsley.
Expert Tips for Piccata Success
- Use Cold Butter: Always whisk in cold butter at the very end of the sauce-making process. Room temperature or melted butter will likely cause the sauce to “break” and become greasy.
- Don’t Skip the Fond: Those brown bits in the pan are gold. If the pan looks too dry after searing, add a teaspoon of oil before deglazing to ensure you capture every bit of flavor.
- Rinse the Capers: If you find capers too salty, give them a quick rinse under cold water. However, for an authentic Chicken Piccata Recipe, that briny punch is usually desired.
- Dry the Chicken: Pat your chicken dry with paper towels before dredging. If the meat is wet, the flour will turn into a paste rather than a crisp coating.
The Best Sides for Your Chicken Piccata
Because the sauce is so vibrant and acidic, you want side dishes that can either soak up the extra liquid or provide a cool, creamy contrast. While traditional pasta is a favorite, there are many other ways to enjoy this meal.
If you’re serving this at a summer gathering, a side of deviled egg macaroni salad provides a nostalgic, creamy counterpoint to the sharp lemon. For a lighter, more refreshing pairing, consider an Asian cabbage salad which mimics the crunch and acidity of the main dish.
For those who love a variety of textures on the plate, serving these cutlets alongside grilled shrimp skewers creates a fantastic “land and sea” experience that feels incredibly decadent.
Storage, Reheating, and Freezing
Chicken Piccata is best enjoyed immediately to appreciate the crispness of the chicken and the stability of the emulsion. However, leftovers can be stored in an airtight container in the refrigerator for up to 3 days.
When reheating, avoid the microwave as it will make the chicken rubbery and cause the sauce to separate. Instead, place the chicken and sauce in a small skillet over low heat. Add a splash of chicken stock or water to loosen the sauce as it warms up.
We do not recommend freezing this dish. The delicate lemon-butter sauce will break upon thawing, and the texture of the dredged chicken will become soggy.
Frequently Asked Questions
Yes! You can substitute the dry white wine with an equal amount of high-quality chicken stock and a teaspoon of white wine vinegar or extra lemon juice to maintain the necessary acidity.
For the best results, fresh lemon juice is highly recommended. Bottled juice often has a metallic aftertaste and lacks the vibrant aromatic oils found in fresh citrus.
Ensure your chicken is patted completely dry before dredging in flour. Additionally, make sure your skillet and oil are shimmering hot before adding the meat to create an immediate sear.
Boneless, skinless chicken breasts are traditional. They must be pounded to an even 1/4 inch thickness to ensure they cook quickly and remain tender.
A greasy sauce usually happens if the butter was added when the pan was too hot or if the butter was too warm. To ensure a glossy, thick emulsion, whisk in cold butter over very low heat.
The Ultimate Chicken Piccata Recipe
Chicken Piccata Recipe: The Ultimate Guide to Golden, Glossy Lemon Butter Perfection
Ingredients
Equipment
Method
- Slice chicken breasts horizontally and pound to 1/4 inch (6mm) thickness. Season with salt and pepper.
- Coat chicken lightly in flour, shaking off any excess for a thin, even layer.
- Heat oil and 1 tbsp butter in skillet. Sear chicken for 3-4 minutes per side until golden-brown. Remove and set aside.
- Add wine to the skillet, scraping up the fond. Add lemon juice and capers; simmer until reduced by half.
- Lower heat and whisk in remaining cold butter one tablespoon at a time until the sauce is glossy and yellow.
- Return chicken to the pan to coat. Garnish with lemon wheels and parsley.
Notes
Don't crowd the pan during searing to ensure a golden-brown crust.
Closing & Call to Action
Mastering this Chicken Piccata Recipe is a rite of passage for every home cook. It teaches the fundamentals of pan-searing, pan-sauce creation, and flavor balancing. Once you see that glossy sauce coat your golden-brown chicken, you’ll understand why this is a perennial favorite.
Did you try this recipe? We would love to see your results! Leave a comment below and let us know how your sauce turned out. Don’t forget to follow us on Pinterest for more culinary inspiration and visual guides.


