Banana Pudding Fudge is the ultimate fusion of a classic Southern comfort dessert and a decadent, melt-in-your-mouth confection. This recipe takes everything you love about traditional banana pudding—the creamy sweetness, the aromatic fruit notes, and the signature crunch of vanilla wafers—and condenses it into thick, square-cut pieces of pure bliss.
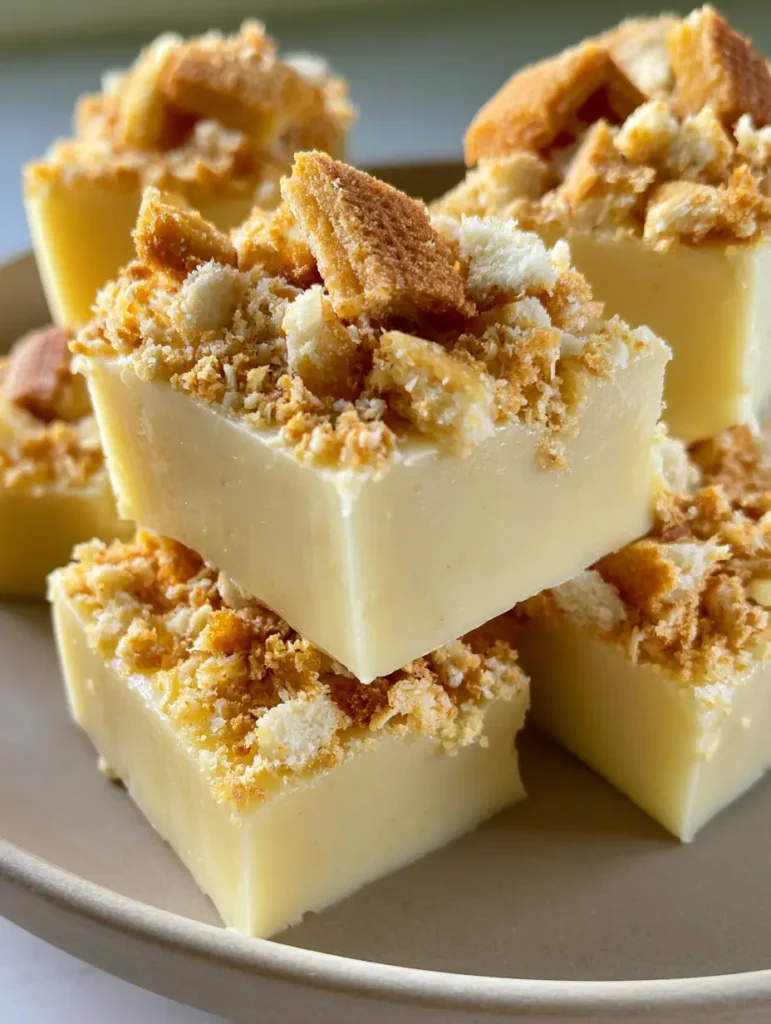
If you have ever craved the nostalgic flavor of a bowl of pudding but wanted the portable, shareable nature of a holiday treat, this is the solution. The result is a dense, smooth, opaque pale yellow fudge base that looks as beautiful on a ceramic plate as it tastes on your tongue.
Creating a fudge that perfectly mimics a pudding’s profile requires more than just mixing ingredients; it demands a forensic approach to texture and flavor layering. By using high-quality white chocolate and specific pudding stabilizers, we achieve a matte texture that highlights the dry crunch of the cookie crumbs decorating every square.
Why This Creamy Banana Treat Wins Every Time
- Authentic Pudding Flavor: We utilize real instant pudding mix to provide that unmistakable, nostalgic banana profile and a set, creamy texture.
- Dual-Textured Cookie Encrustment: A mixture of finely pulverized and coarsely broken golden-brown vanilla wafer cookies creates a sophisticated mouthfeel.
- Matte Finish Elegance: Unlike greasy, over-boiled fudges, this version has a smooth, opaque pale yellow base that looks professional and unedited.
- No-Bake Simplicity: This recipe delivers high-impact results with minimal kitchen heat, making it perfect for summer gatherings or busy holiday schedules.
When you bite into this Banana Pudding Fudge, the first thing you notice is the contrast between the heavily encrusted top and the yielding, buttery center. It is a sensory experience that rivals even the best no-bake banana pudding recipes you may have tried in the past.
The Essential Components for a Dense, Pale Yellow Base
White Chocolate Chips (approx. 18 oz / 510g): This serves as the structural foundation of our fudge. Choose a high-quality brand with cocoa butter listed as a primary ingredient to ensure a smooth, opaque finish rather than a translucent, waxy one.
Sweetened Condensed Milk (14 oz / 396g): This provides the necessary sugar and moisture to create a fudge that is creamy rather than crumbly. It acts as the binder that holds our “pudding” together in a solid state.
Instant Banana Cream Pudding Mix (3.4 oz / 96g): This is our secret weapon for both the pale yellow color and the authentic flavor. The starch in the pudding mix also helps stabilize the white chocolate, preventing it from separating during the melting process.
Unsalted Butter (1/4 cup / 57g): A small amount of butter adds a rich, silky mouthfeel. It ensures the fudge remains “opaque” and “matte” as described in our visual blueprint, rather than becoming too hard or brittle.
Vanilla Wafer Cookies (approx. 40 cookies / 150g): You will need a mix of textures here. We will pulverize some into golden brown cookie crumbs and leave others in coarsely broken pieces for that signature encrusted look.
Banana Extract (1 tsp / 5ml): While the pudding mix provides the base flavor, a touch of pure banana extract deepens the aromatic profile. This ensures the scent matches the beautiful pale yellow visual.
Salt (1/4 tsp / 1.5g): Never skip salt in a sweet recipe. A fine sea salt balances the sugar from the condensed milk and white chocolate, making the banana flavor pop.
Professional Tools for a Perfectly Set Fudge
To achieve the thick, square-cut pieces seen in our handheld smartphone photo, you need the right gear. A standard 8×8 inch (20x20cm) square baking pan is essential for achieving that specific height.
Line your pan with parchment paper, leaving an overhang on the sides. This allows you to lift the entire block of fudge out once set, ensuring clean, sharp edges when you slice it. A heavy-bottomed saucepan is also required to prevent the white chocolate from scorching, which would ruin the pale yellow aesthetic.
Finally, a food processor or a heavy rolling pin is needed to create the various cookie textures. You want a gradient of “finely pulverized” to “coarsely broken” crumbs to replicate the dry crunch highlighted in the visual prompt.

How to Construct the Ultimate Banana Pudding Fudge
Preparing the Golden-Brown Cookie Encrustment
Start by taking half of your vanilla wafers and placing them in a sealed bag. Use a rolling pin to crush them into coarse, jagged pieces. Take the other half and pulse them in a food processor until they are a fine, sandy dust.
Mix these two textures together in a bowl. This mixture is what will create the “heavily encrusted” top. Having both sizes ensures that the cookie crumbs fill every gap, while the larger pieces provide the visual “golden brown” appeal.
Melting the Smooth Fudge Base
In your heavy-bottomed saucepan over low heat, combine the sweetened condensed milk, butter, and salt. Once the butter has melted, stir in the white chocolate chips. Stir constantly with a silicone spatula.
This is a critical moment for visual accuracy. You are looking for a “dense, smooth, opaque” mixture. Do not turn up the heat; high heat will cause the cocoa butter to leak, resulting in a greasy finish instead of the desired matte texture.
Infusing the Banana Pudding Flavor
Once the chocolate is completely smooth, whisk in the dry instant banana pudding mix and the banana extract. The mixture will thicken significantly and turn a beautiful, pale yellow color.
Continue to stir over low heat for about 1 minute. You should see the fudge pulling away from the sides of the pan slightly. This is the “creamy, set texture” beginning to form even before it hits the fridge.
Layering and Finishing for Maximum Visual Impact
Pour the warm fudge into your prepared 8×8 pan. Use an offset spatula to smooth the top into an even layer. While the fudge is still warm and tacky, immediately dump your wafer cookie mixture over the top.
Press the crumbs down firmly with the palm of your hand. You want the cookies to be embedded into the top layer of the fudge so they don’t fall off when sliced. This creates that “foundation” look where the cookie crumbs are an integral part of the square.
Expert Tips for Fudge Perfection
- The Temperature Rule: Never boil white chocolate fudge. It is much more delicate than dark chocolate and will seize or “split,” losing its smooth, opaque look.
- Slicing for the “Smartphone Photo” Look: For those perfectly thick, square-cut pieces, chill the fudge for at least 4 hours. Use a hot, dry knife to slice, wiping the blade between every single cut.
- Pudding Mix Varieties: Ensure you are using “Instant” pudding mix, not the “Cook and Serve” variety. The instant version contains the cold-set thickeners required for this specific texture.
- Combating Humidity: If you live in a humid climate, keep the fudge in the fridge until 10 minutes before serving to maintain the “dry crunch” of the cookie crumbs.
The Science of the Matte Finish
In our visual recipe blueprint, we emphasize a “matte texture.” This is achieved through the emulsion of the milk solids in the condensed milk and the starches in the pudding mix. If your fudge looks shiny, it usually means the fats have separated.
To fix this, ensure your white chocolate contains no vegetable oils (check the label for “palm oil” or “hydrogenated fats”). Real cocoa butter is essential for that professional, opaque pale yellow base that looks so authentic in mobile photography.
What to Serve with Banana Pudding Fudge
This fudge is incredibly rich, so it pairs best with items that offer a bit of acidity or a refreshing contrast. If you are serving this at a summer BBQ, it follows perfectly after a main course of garlic butter shrimp scampi (coming soon) or even a lighter chicken club sandwich.
For a full dessert spread, consider contrasting the dense fudge with a bright ambrosia fruit salad. The citrus and coconut in the salad highlight the tropical notes of the banana without overwhelming the palate.
If you’re hosting a savory-heavy party with spicy garlic beef croquettes (coming soon), this sweet, creamy fudge provides the perfect cooling finish to the meal.
Frequently Asked Questions
No, you must use Instant pudding mix. Instant mix contains modified starches that thicken without boiling, which is essential for stabilizing this specific style of no-bake fudge.
It is not recommended to use fresh mashed bananas in this specific fudge, as the moisture content will prevent the white chocolate from setting properly. The instant pudding mix and banana extract provide the authentic flavor and the required ‘set’ texture.
While it is stable at room temperature for serving, it is best stored in the refrigerator to keep the texture dense and the vanilla wafer topping crunchy. This is especially important in humid environments.
Stored in an airtight container in the fridge, the fudge will remain fresh for up to 2 weeks. For the best cookie crunch, consume within the first 5 days.
This usually happens if the white chocolate is melted at too high a temperature, causing the fats to separate. Always melt on the lowest heat setting possible and stir constantly to maintain that opaque, smooth finish.
The Ultimate Banana Pudding Fudge Recipe
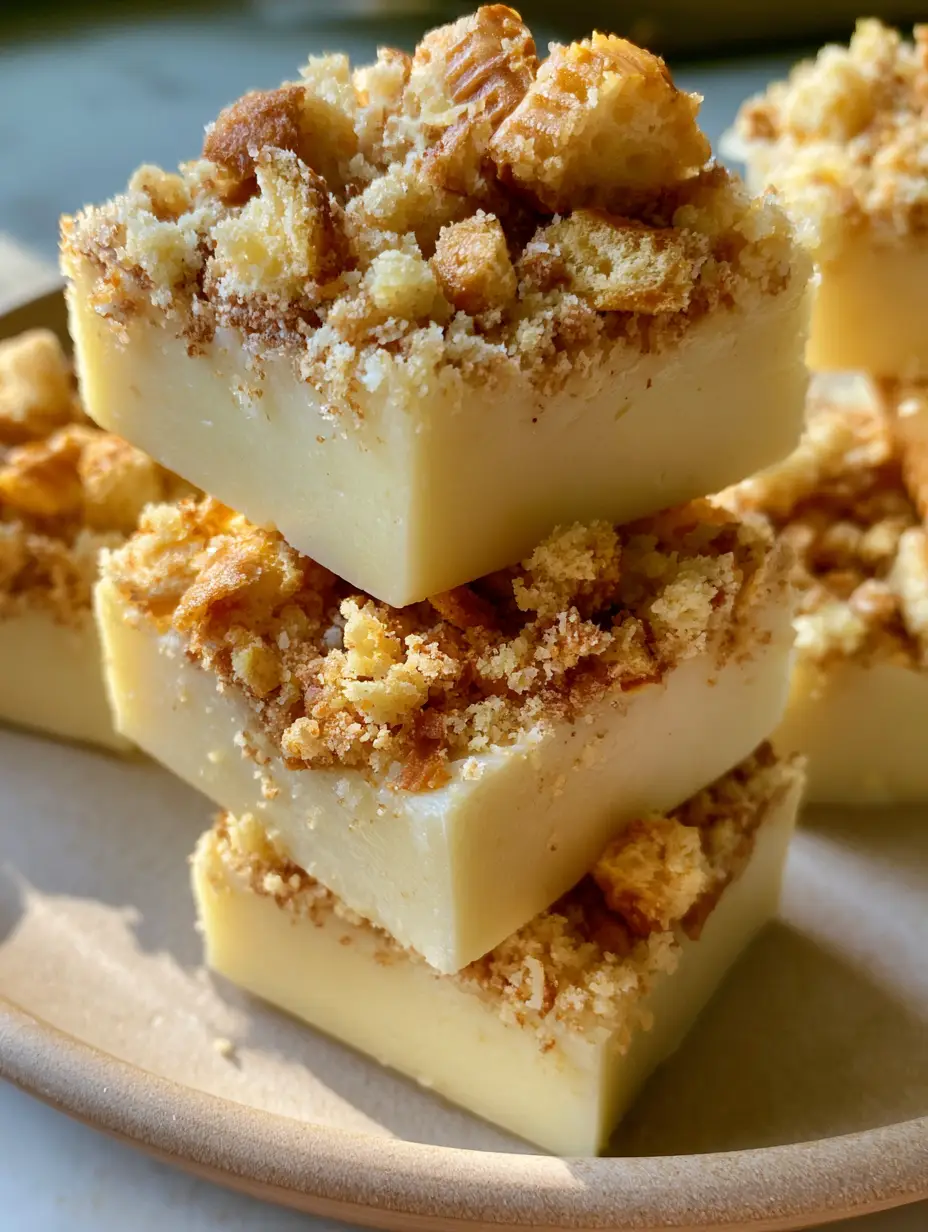
Banana Pudding Fudge with a Crunchy Vanilla Wafer Crust
Ingredients
Equipment
Method
- Line an 8x8 inch baking pan with parchment paper, leaving an overhang on two sides for easy removal.
- Divide vanilla wafers in half. Pulverize one half into fine crumbs in a food processor. Coarsely break the other half by hand. Mix both together in a bowl.
- In a heavy saucepan over low heat, combine condensed milk, butter, and salt. Once melted, stir in white chocolate chips continuously until smooth and opaque.
- Whisk in the dry banana pudding mix and banana extract. Stir for 1 minute until the mixture is a thick, pale yellow color and pulls away from the sides.
- Pour fudge into the prepared pan. Immediately top with the cookie mixture, pressing firmly so the crumbs embed into the fudge surface.
- Refrigerate for at least 4 hours. Once set, lift the parchment paper to remove the fudge and slice into 16 thick squares.
Notes
Do not substitute 'Cook and Serve' pudding for 'Instant'.

Closing & Call to Action
This Banana Pudding Fudge is more than just a sweet treat; it’s a conversation starter. The thick, square-cut pieces and heavily encrusted cookie top make it a visual standout on any dessert table. Whether you are a seasoned baker or a home cook looking for a reliable no-bake win, this recipe delivers on both flavor and “experience.”
Did you make this recipe? We would love to see your results! Post a photo of your fudge squares and tag us. Don’t forget to follow CrispCrumbs on Pinterest for more visually stunning recipe blueprints and culinary inspiration. If you enjoyed this, leave a comment below with your favorite way to serve banana pudding!


