There is something undeniably satisfying about a handheld snack that delivers the full flavor profile of a backyard cookout in a single, steaming bite. These bacon cheeseburger bombs are the architectural answer to your cravings, featuring a soft, pillowy exterior and a molten core of savory goodness.
When you pull these from the oven, the first thing you notice is the scent of melted butter infused with dried parsley. As you tear one open, the visual reward is immediate: thick, melted orange cheddar clinging to seasoned ground beef crumbles and shards of crispy reddish-brown bacon.
Whether you are hosting a game day party or looking for a fun family dinner, this recipe bridges the gap between comfort food and gourmet finger foods. The natural daylight hitting the golden crust in our photos highlights the realistic textures you can achieve in your own kitchen with just a few pantry staples.
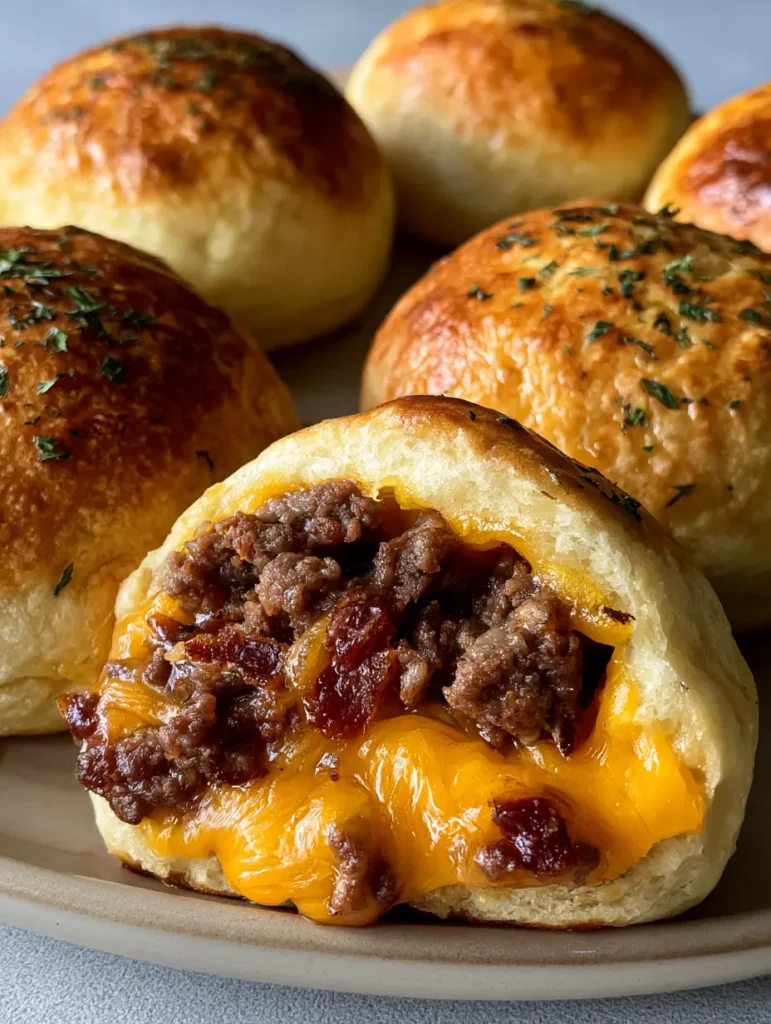
The Irresistible Anatomy of a Perfect Burger Bomb
- Golden-Brown Precision: The refrigerated biscuit dough transforms into a light, airy vessel that perfectly encases the heavy fillings.
- The Triple Threat Core: We combine browned ground beef, sharp orange cheddar, and crispy bacon for a classic flavor trifecta.
- Aromatic Butter Glaze: A final brush of melted butter and dried parsley flakes creates a shimmering, herb-speckled finish.
- Steam-Trapped Texture: By sealing the dough tightly, we ensure the beef stays juicy while the cheese reaches peak “molten” status.
Foundational Ingredients for Success
Refrigerated Biscuit Dough: One 16.3 oz (462g) tube of “Grands” style biscuits provides the structural integrity needed to hold the filling without bursting. This dough is engineered for that signature golden-brown rise and buttery crumb.
Lean Ground Beef: You will need 1 lb (454g) of 80/20 or 90/10 ground beef. Searing the beef until it forms small, seasoned crumbles is the key to that authentic burger texture inside the bomb.
Crispy Bacon Bits: Use 6-8 slices (approx. 150g) of thick-cut bacon, cooked until very crisp. The reddish-brown bits provide a necessary salty crunch that contrasts with the soft dough.
Orange Cheddar Cheese: Specifically, sharp orange cheddar provides the high-contrast visual and the oily, salty melt we are looking for. You will need about 4 oz (115g) cut into small cubes or shredded.
Salt and Black Pepper: These foundational seasonings enhance the natural beefy notes. Use 1 tsp (6g) kosher salt and 1/2 tsp (1g) freshly cracked black pepper during the browning process.
Unsalted Butter: 3 tbsp (42g) of butter, melted, serves as the finishing glaze. It adds a rich mouthfeel and helps the parsley flakes adhere to the surface.
Dried Parsley Flakes: 1 tsp (1g) of dried parsley provides the green speckles seen in the visual blueprint. It adds a subtle earthy aroma that balances the richness of the fats.
Essential Kitchen Tools for Handheld Perfection
To achieve the results seen on the ceramic plate in our photos, you will need a large non-stick skillet for browning the beef and bacon. A standard baking sheet lined with parchment paper ensures the biscuit bottoms don’t stick or burn too quickly.
A pastry brush is vital for applying the butter glaze evenly across the rounded tops. Finally, a sharp chef’s knife or kitchen shears will make quick work of the bacon and dough preparation.

Mastering the Build: Step-by-Step Instructions
Developing the Savory Beef Filling
In a large skillet over medium-high heat, add your ground beef. Use a wooden spoon to break the meat into small, even crumbles as it browns.
Once the beef is fully cooked and has developed a deep, savory brown color, drain the excess fat. Season immediately with your salt and pepper, then set aside to cool slightly so it doesn’t prematurely melt the dough.
Preparing the Bacon and Cheese
While the beef cools, fry your bacon until it is exceptionally crispy and reddish-brown. Let it drain on paper towels before crumbling it into small, uniform bits.
If using block cheese, cut your orange cheddar into 1/2-inch cubes. If you are using croquette-style fillings (coming soon) in the future, remember that the cube method often results in a better “cheese pull” than shredded cheese.
Assembling the Dough Balls
Open your biscuit dough and separate each biscuit. Use your fingers to flatten each piece into a 4-inch (10cm) circle, ensuring the center is slightly thicker than the edges.
Place a spoonful of browned beef, a pinch of bacon bits, and a cube of cheddar in the center. Carefully gather the edges of the dough and pinch them tightly to seal, rolling the ball between your palms to create a smooth, round shape.
The Golden Bake and Butter Glaze
Place the bombs seam-side down on your prepared baking sheet. Bake at 375°F (190°C) for 12-15 minutes, or until the exterior reaches a deep, golden-brown hue.
While the bombs bake, melt your butter and stir in the dried parsley. As soon as the tray comes out of the oven, brush the tops generously with the herb butter until they shimmer under the kitchen lights.
Chef’s Secrets for Flawless Bacon Cheeseburger Bombs
- Seal the Seam: To prevent cheese leaks, ensure your fingers are free of grease when pinching the dough; a dry seal is a strong seal.
- Cool the Meat: Never put steaming hot beef directly onto raw dough, or it will become gummy and difficult to handle.
- Consistent Sizing: Weigh your filling portions if you want perfectly uniform “bombs” that cook at the exact same rate.
- The Resting Period: Let the bombs sit for 3-5 minutes after glazing; this allows the cheese to set slightly so it doesn’t liquidize and run out during the first bite.
Reliable Storage and Reheating Protocols
These bombs are best enjoyed fresh, but leftovers can be stored in an airtight container in the refrigerator for up to 3 days. To maintain the crispness of the bacon and the fluffiness of the dough, avoid the microwave if possible.
For the best results, reheat in an oven or air fryer at 350°F (175°C) for 5-7 minutes. This restores the golden-brown texture and ensures the cheddar core is once again molten and steaming.
What to Serve with Your Savory Dough Balls
To cut through the richness of the beef and cheese, a bright and acidic side is essential. We highly recommend pairing these with a crisp jalapeno slaw (coming soon) for a spicy, crunchy contrast.
If you are serving these as part of a larger spread, they pair beautifully with a side of creamy peppercorn sauce (coming soon) for dipping. For a refreshing palate cleanser afterward, a chilled ambrosia fruit salad provides a sweet finish to a savory meal.
Pro Kitchen Frequently Asked Questions
Yes. Assemble the bombs and freeze them on a tray before transferring to a bag. Bake from frozen at 350°F, adding about 5-8 minutes to the total baking time.
Absolutely! Cook them at 330°F (165°C) for 8-10 minutes. The air fryer is excellent for achieving that golden-brown exterior even faster than a traditional oven.
Yes, you can use a standard yeast dough or a buttermilk biscuit recipe. Just ensure the dough is rolled thin enough to cook through at the same rate as the beef filling.
Make sure you pinch the dough seams very tightly with dry fingers. Placing the bombs seam-side down on the baking sheet also uses the weight of the bomb to keep the seal closed.
To keep the dough from getting chewy, reheat in the oven or air fryer at 350°F until the center is warm. Avoid the microwave if you want to maintain the crispy bacon texture.
The Complete Bacon Cheeseburger Bombs Recipe
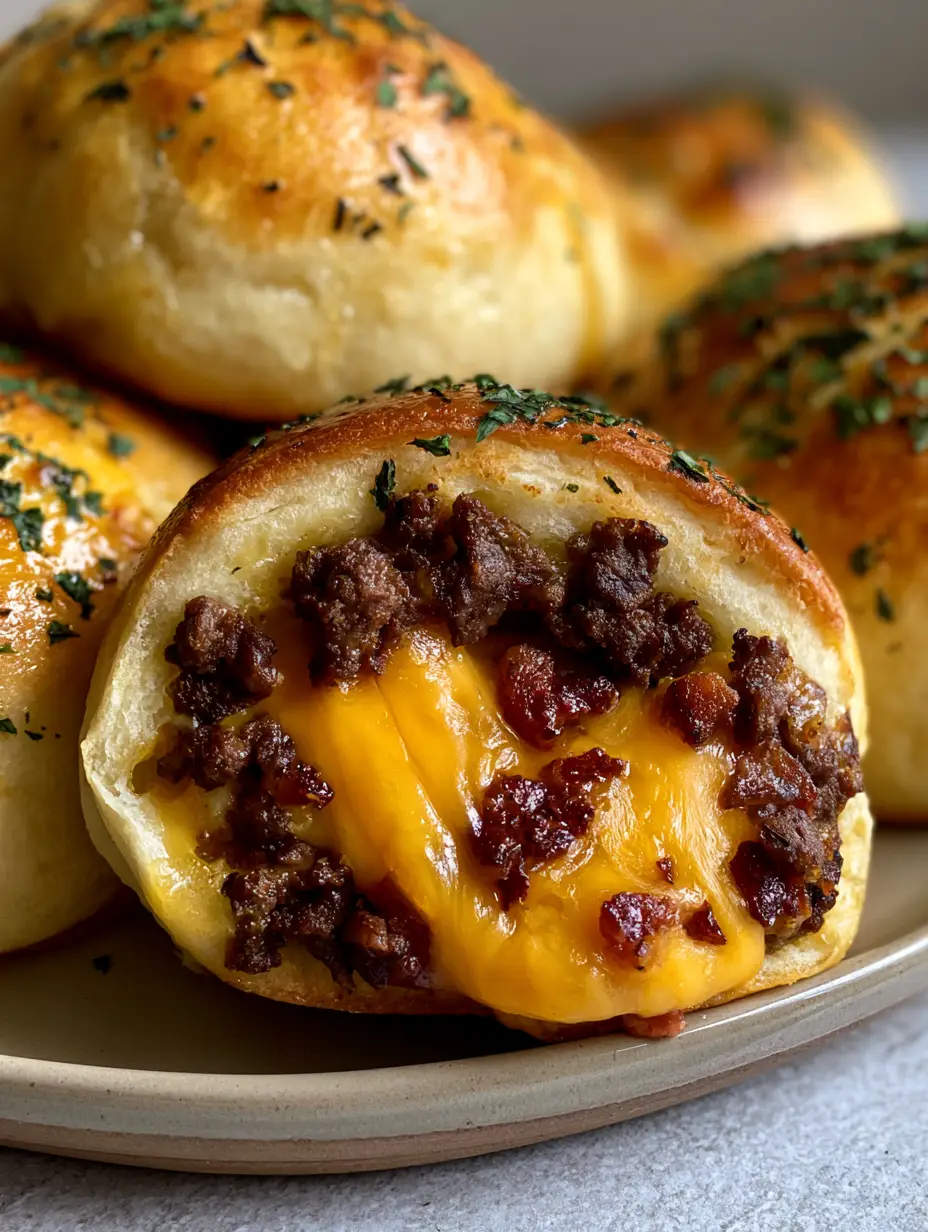
Bacon Cheeseburger Bombs: The Ultimate Golden-Brown Biscuit Appetizer
Ingredients
Equipment
Method
- In a large skillet over medium-high heat, cook ground beef until browned and crumbled. Drain excess grease and season with salt and pepper.
- Fry bacon until crispy, then crumble into small bits. Cut the orange cheddar into 8 equal cubes.
- Flatten each biscuit into a 4-inch circle. Place a spoonful of beef, bacon bits, and one cheese cube in the center. Pinch edges tightly to seal into a ball.
- Place seam-side down on a parchment-lined sheet. Bake at 375°F (190°C) for 12-15 minutes until golden-brown.
- Mix melted butter and parsley. Brush over the hot biscuit bombs immediately after removing from the oven.
Notes
Let the bombs rest for 5 minutes before serving to avoid burns from the steaming core.

Bringing the Cookout Indoors
These bacon cheeseburger bombs offer a sophisticated yet simple way to enjoy classic flavors in a modern, handheld format. The combination of the golden-brown crust and the savory, cheese-laden interior makes them an instant favorite for any occasion.
If you enjoyed this recipe, please leave a comment below and let us know how yours turned out! Don’t forget to follow us on Pinterest for more culinary inspiration and visual guides to your favorite comfort foods.


