If you have been searching for the ultimate low-carb snack that actually delivers on crunch, look no further than these Crispy Cottage Cheese Chips. This viral sensation has taken the culinary world by storm, transforming a humble tub of curds into a sophisticated, golden-brown delicacy that rivals any traditional potato chip. Imagine a handheld snack that is delicate, lacy, and packed with savory Mediterranean notes.
The visual appeal of these chips is undeniable. When baked to perfection, they develop a stunning toasted amber center that transitions into dark, brittle golden-brown edges. The texture is characterized by many small holes where the cheese has melted and crisped, creating a beautiful lacy pattern. Speckled with fine flakes of dried green oregano and cracked black pepper, these chips look as good as they taste.
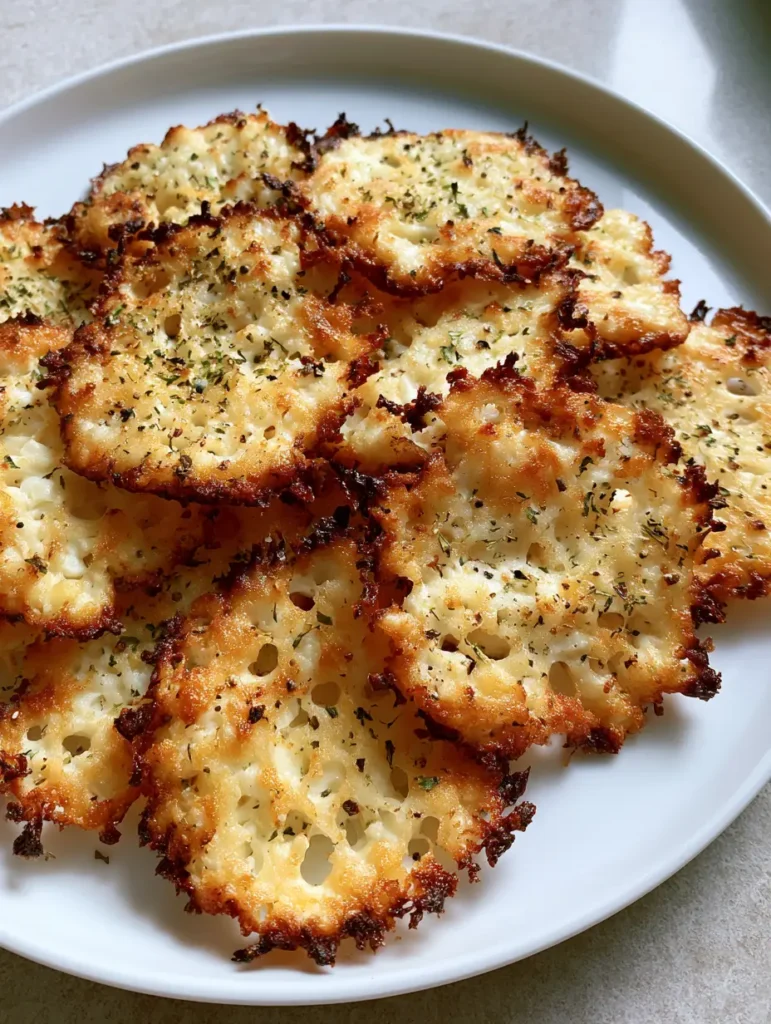
Why You Will Obsess Over This Lacy, Golden Protein Snack
- Unmatched Texture: The “lacy” structure provides a satisfying snap that is rare in high-protein, keto-friendly snacks.
- Flavor Complexity: The combination of sea salt, cracked black pepper, and dried oregano creates a savory profile that enhances the natural tang of the cheese.
- Macro-Friendly Indulgence: These Crispy Cottage Cheese Chips are essentially pure protein, making them a guilt-free option for any time of day.
- Visually Stunning: With their brittle, dark golden edges and speckled herb finish, they are a showstopper on any appetizer platter.
What makes this recipe a standout is its simplicity. By understanding the science of moisture evaporation, we can turn a wet ingredient like cottage cheese into a dry, brittle chip. This transformation relies on the Maillard reaction, where the proteins and sugars in the cheese brown under heat, creating that signature toasted amber hue described in our visual blueprint.
The Essential Ingredients for Savory, Brittle Rounds
To achieve the exact look of our handheld smartphone photo, you need specific ingredients that contribute to both the structure and the aesthetic of the final chip. Every component here serves a functional and visual purpose.
Full-Fat Cottage Cheese: 1 cup (225g) of small-curd cottage cheese is the base. The fat content is crucial for achieving the “toasted amber” color and ensuring the chips don’t simply stick to the parchment paper; 4% milkfat is highly recommended for the best structural integrity.
Dried Oregano Flakes: 1 tsp (1g) of dried oregano provides those “fine flakes of dried green herbs” seen in the visual prompt. Beyond the visual, oregano adds a woodsy, earthy aroma that pairs perfectly with the salty cheese.
Cracked Black Pepper: 1/2 tsp (1g) of freshly cracked black pepper. Using a coarse grind ensures you see the “small grains of black pepper” speckled across the surface, providing a sharp contrast against the golden cheese.
Sea Salt: 1/4 tsp (1.5g) of fine sea salt. While cottage cheese is naturally salty, a tiny extra sprinkle helps draw out moisture during the baking process, ensuring the chips become brittle rather than chewy.
Foundational Element: Non-Stick Surface: While not an ingredient in the taste profile, high-quality parchment paper or a silicone baking mat is mandatory. Without this, the lacy melted cheese texture will bond to your pan, making it impossible to lift the chips into the pile seen on our white ceramic plate.
Must-Have Equipment for Perfect Lacy Textures
To recreate the exact visual result of thin, circular, baked cottage cheese rounds, you need the right tools. Precision is the key to preventing the chips from merging into one giant sheet of cheese.
Large Baking Sheet: A heavy-duty rimmed baking sheet ensures even heat distribution, which is vital for getting those dark golden brown edges without burning the centers.
Parchment Paper: Essential for the “brittle” release. Do not use wax paper, as it will melt at the temperatures required for this recipe.
Small Cookie Scoop or Tablespoon: To achieve the “circular” shape, you need to portion the cheese into consistent mounds. A scoop that holds about 1 tbsp (15ml) is the ideal size for a handheld chip.

Step-by-Step Instructions: Mastering the Maillard Reaction
Creating Crispy Cottage Cheese Chips is a lesson in patience and sensory observation. Follow these steps to ensure your chips match the “handheld smartphone photo” exactly.
Step 1: Preparing the Base and Preheating
Preheat your oven to 375°F (190°C). Position your oven rack in the center to allow for even airflow above and below the tray. Line your baking sheet with a fresh piece of parchment paper. Ensure the paper lies completely flat to prevent the cheese from running into odd shapes.
Step 2: Portioning for Circular Perfection
Using your spoon or cookie scoop, place 1 tbsp (15g) mounds of cottage cheese onto the parchment paper. Space them at least 3 inches (7.5cm) apart. As the moisture evaporates, the cheese will spread significantly to create that thin, lacy texture. If the mounds are too close, they will fuse into a single “cheese cracker” rather than individual chips.
Step 3: Seasoning for Visual Contrast
Gently flatten each mound with the back of a spoon until it is about 1/4 inch (6mm) thick. Sprinkle the dried oregano flakes, cracked black pepper, and sea salt evenly over each round. You want to see the “speckled” effect clearly against the white curds before they go into the oven.
Step 4: The Baking Process and Visual Cues
Slide the tray into the oven and bake for 30–35 minutes. Around the 20-minute mark, you will hear a distinct hissing sound as the water escapes. Watch for the edges to transition from pale yellow to a dark golden brown. The centers should reach a toasted amber shade. The chips are done when the “small holes” are clearly visible and the bubbling has almost entirely subsided.
Step 5: The Cooling Phase for Maximum Brittleness
This is the most critical step for achieving a “brittle” texture. Remove the tray from the oven but do not touch the chips for at least 10 minutes. As they cool, the proteins solidify, turning the melted cheese into a crisp, handheld snack. Once cooled, they should peel away from the parchment effortlessly.
Expert Tips for Success with Crispy Cottage Cheese Chips
- Drain the Excess: If your cottage cheese is particularly watery, strain it through a fine-mesh sieve for 5 minutes before portioning. This speeds up the baking time and ensures a crispier result.
- Avoid Overcrowding: If you crowd the pan, the steam from the chips will prevent them from becoming brittle. Use two pans if necessary.
- Watch the Color: The difference between “dark golden brown” and “burnt” is only a minute or two. Stay close to the oven during the final 5 minutes.
- Uniform Thickness: Ensure the centers aren’t significantly thicker than the edges, or you will end up with brittle perimeters and chewy middles.
The Best Pairings for Your Protein Chips
These Crispy Cottage Cheese Chips are incredibly versatile. While they are delicious on their own, pairing them with the right dip or side dish can elevate the experience. For a Mediterranean vibe, serve them alongside a bowl of authentic Greek tzatziki which complements the oregano flakes perfectly.
If you prefer a bolder flavor profile, these chips act as the perfect vessel for a rich peppercorn sauce (coming soon) or even as a crunchy topping for a zesty jalapeno slaw (coming soon). The brittle texture provides a wonderful contrast to creamy or crunchy vegetable-based sides. For a full lunch spread, try serving them with a classic chicken club sandwich instead of standard potato chips.
Storage, Reheating, and Freezing
Storage: These chips are best enjoyed fresh. However, you can store them in an airtight container at room temperature for up to 2 days. To maintain the brittle texture, place a piece of paper towel in the container to absorb any lingering moisture.
Reheating: If they lose their snap, pop them back into a 350°F (175°C) oven for 2–3 minutes. Avoid the microwave, as it will make them rubbery.
Freezing: Freezing is not recommended for this recipe. The delicate lacy structure will break down upon thawing, resulting in a soggy texture.
Frequently Asked Questions
While it is possible, fat-free versions often lack the structural integrity to form a lacy chip and may stick to the parchment paper. Full-fat (4%) provides the best flavor and texture.
No! Leaving the curds intact is what creates that beautiful, lacy, hole-filled texture. Blending it would result in a solid, flat cracker instead.
You must use high-quality parchment paper or a silicone baking mat. Never grease the pan directly, as the cheese will bond to the metal.
Store them in an airtight container at room temperature for up to 2 days with a paper towel to absorb moisture. Re-crisp in the oven if they soften.
Sogginess is usually caused by not baking them long enough or using cottage cheese with too much moisture. Ensure the edges are dark golden brown and let them cool completely on the tray to harden.
The Ultimate Crispy Cottage Cheese Chips Recipe
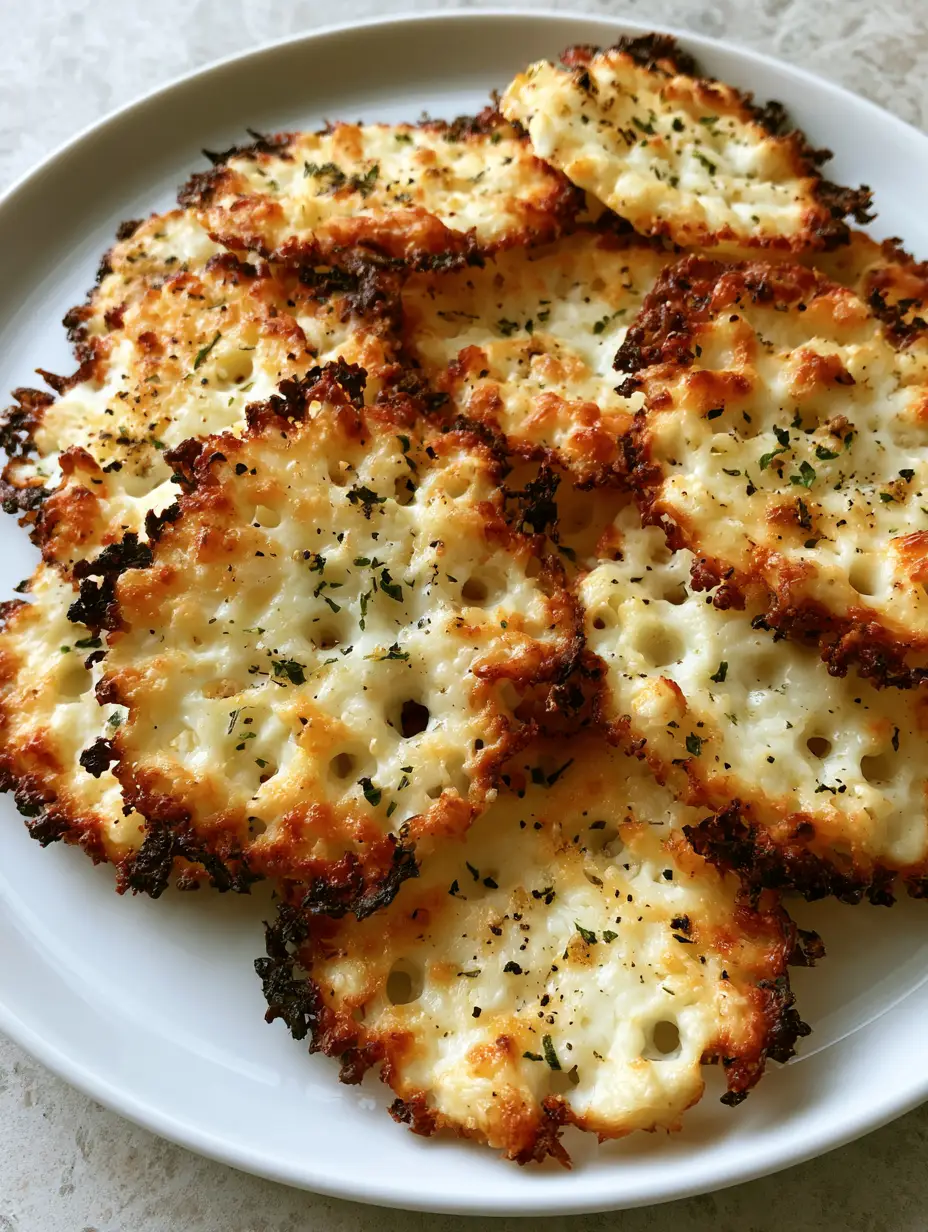
Crispy Cottage Cheese Chips: The High-Protein, Lacy Snack You Need
Ingredients
Equipment
Method
- Preheat your oven to 375°F (190°C) and line a large baking sheet with parchment paper.
- Scoop 1 tbsp (15g) mounds of cottage cheese onto the parchment, spacing them 3 inches apart.
- Flatten the mounds slightly and sprinkle with dried oregano, cracked black pepper, and sea salt.
- Bake for 30-35 minutes until the edges are dark golden brown and the centers are toasted amber.
- Allow to cool completely on the tray for 10 minutes until brittle and crisp.
Notes
Do not skip the cooling process or the chips will be soft.
Final Thoughts: Your New Favorite Low-Carb Crunch
The Crispy Cottage Cheese Chips are a testament to the fact that healthy eating does not have to be boring. With their lacy texture, toasted amber centers, and savory herb speckles, they satisfy the craving for a salty snack while providing a massive protein boost. Whether you are hosting a party or looking for a mid-afternoon pick-me-up, these chips are sure to become a staple in your kitchen.
Did you try this recipe? We would love to hear how your chips turned out! Leave a comment below and don’t forget to share your beautiful lacy creations to Pinterest!


