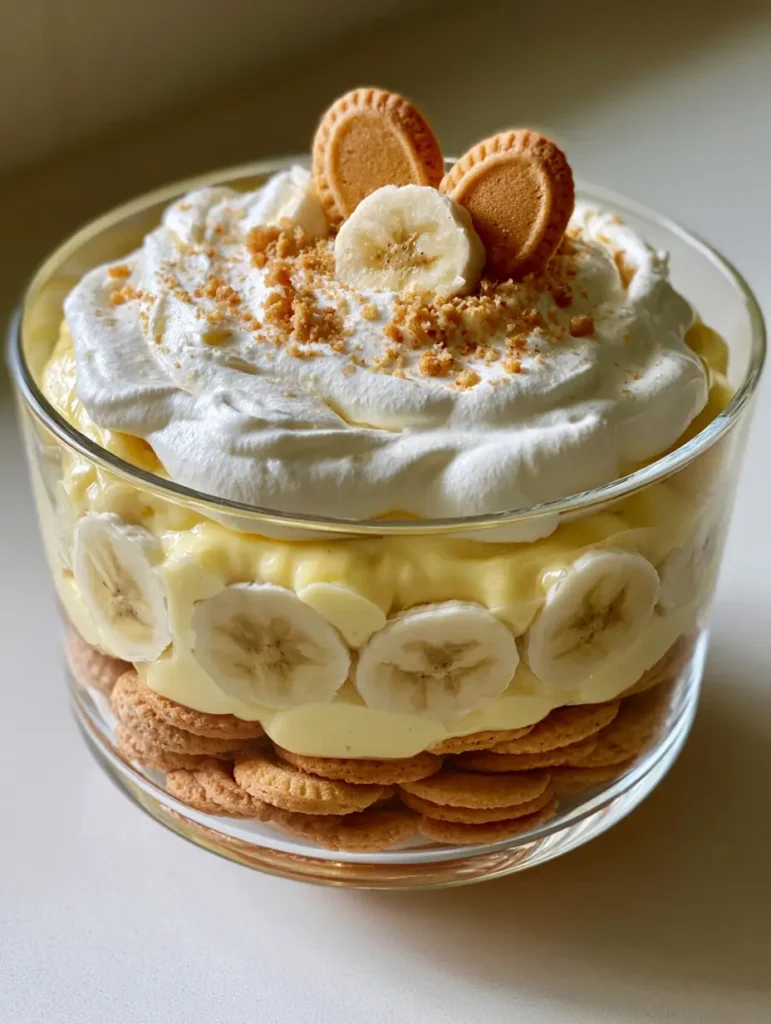
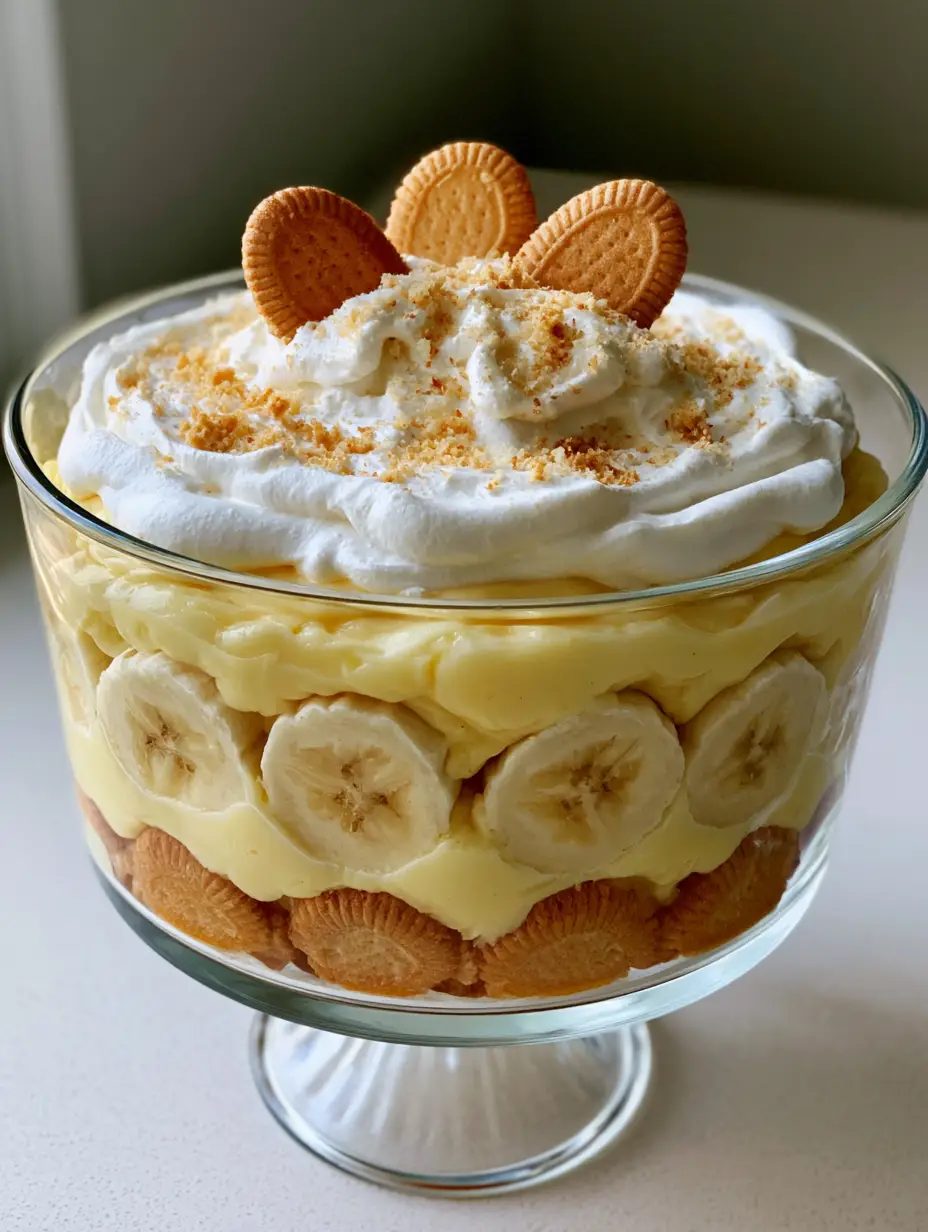
There is perhaps no dessert more iconic to the American South than a towering, meticulously layered No Bake Banana Pudding. When you see that clear glass trifle bowl on a countertop, catching the soft natural daylight of a lazy Sunday afternoon, you know you are in for a treat that is as much about texture as it is about flavor. This isn’t just a quick snack; it is a culinary masterpiece of pale yellow custard, golden-brown vanilla wafers, and pillowy white whipped cream.
The beauty of a No Bake Banana Pudding lies in its simplicity and the forensic precision of its assembly. Each layer serves a structural and gustatory purpose, from the solid wafer foundation that absorbs the moisture of the custard to the fresh banana rounds pressed firmly against the glass for that signature visual appeal. It is a dish that invites nostalgia while demanding the respect of a well-executed pastry project.
Why This Creamy Southern Classic Is a Showstopper
- Textural Contrast: You get the crunch of dry wafers, the cake-like softness of soaked wafers, the snap of fresh bananas, and the velvet smooth custard in every bite.
- Visual Elegance: The clear glass bowl allows guests to see the meticulous layers of fruit and cream, making it a centerpiece for any gathering.
- Zero Heat Required: This recipe relies on cold-set science, keeping your kitchen cool while delivering a high-end dessert experience.
- Make-Ahead Magic: This pudding actually improves over time as the flavors meld and the wafers reach their optimal “soft-set” consistency.
The Anatomy of a Perfect No Bake Banana Pudding
To achieve the look of a professional Southern kitchen, you must understand the “why” behind each ingredient. We aren’t just mixing things together; we are building a structural dessert that must stand tall in a trifle bowl without collapsing into a soupy mess.
The Golden-Brown Vanilla Wafer Foundation
You will need about 11 oz (312g) of whole vanilla wafers. These act as the “sponge” of the dessert; they provide the structural base and a sweet, toasted vanilla flavor that complements the fruit perfectly.
The Rich Pale Yellow Custard Base
A combination of 1 can (14 oz / 396g) of sweetened condensed milk and 2 cups (480ml) of cold whole milk provides the creamy backbone. Using a 5.1 oz (144g) box of instant vanilla pudding mix ensures a quick set that remains dense enough to support the weight of the bananas.
Fresh Sliced Bananas
Use 5-6 large bananas that are yellow with just a few brown speckles. If they are too green, they lack sweetness; if they are too ripe, they will become mushy and brown too quickly once sliced.
The Pillowy Whipped Cream Topping
We use 2 cups (480ml) of heavy whipping cream, beaten to stiff peaks with 1/2 cup (60g) of powdered sugar and 1 tsp (5ml) of vanilla extract. This creates the smooth, white finish seen in our visual blueprint.
Essential Equipment for a Meticulous Display
To replicate the handheld smartphone photo aesthetic of a high-end food blog, the right tools are non-negotiable. You want the layers to be sharp and the presentation to be clean.
A 3-quart (2.8L) glass trifle bowl is the most important piece of equipment. The vertical sides allow you to press the banana rounds directly against the glass, which is the hallmark of an authentic No Bake Banana Pudding. You will also need a large offset spatula to smooth the whipped cream into that signature pillowy finish.
A stand mixer or high-powered hand mixer is vital for aerating the heavy cream. To get that “cloud-like” texture, the cream must be extremely cold, and the whisking must be consistent. Finally, a simple zip-top bag is needed to create the fine dusting of crushed cookie crumbs for the garnish.

Mastering the Art of the Layering Process
Step 1: The Custard Fusion
In a large mixing bowl, whisk together the sweetened condensed milk and cold whole milk until fully incorporated. Gradually sprinkle in the instant vanilla pudding mix, whisking vigorously for 2 minutes. You will see the liquid transform into a thick, pale yellow custard; let this sit in the refrigerator for 5 minutes to fully firm up.
Step 2: Folding for Lightness
While the custard sets, whip 1 cup (240ml) of the heavy cream until stiff peaks form. Gently fold this whipped cream into the set pudding. This “lightens” the custard, turning a heavy pudding into a mousse-like filling that feels airy on the tongue but looks dense through the glass.
Step 3: Creating the Foundation
Line the bottom of your clear glass bowl with a single, thick layer of whole golden-brown vanilla wafers. Ensure there are no large gaps; this layer must support the weight of everything above it. This is your foundation.
Step 4: The Visual Banana Border
Spread one-third of the pudding mixture over the wafers. Now, slice your bananas into 1/4 inch (6mm) rounds. Press these rounds firmly against the interior glass walls of the bowl. This creates the iconic “rounds of fresh sliced bananas” look. Fill the center with more banana slices and another layer of wafers.
Step 5: Repeating the Layers
Continue the process: pudding, banana border, wafers, until you reach about an inch from the top of the bowl. The final pudding layer should be smooth and level to provide a flat base for the whipped cream topping.
Step 6: The Pillowy Finish and Garnish
Whip the remaining 1 cup (240ml) of heavy cream with the powdered sugar until smooth and thick. Spread this over the top of the pudding, using a spoon to create “swirls” and “peaks.” To finish, place three whole vanilla wafers in the center and sprinkle a fine dusting of crushed cookie crumbs around the edges for a professional touch.
Expert Tips for Success and Visual Accuracy
- Prevent Browning: While the pudding protects the bananas from air, you can toss the slices in a tablespoon of lemon juice if you plan on the dessert sitting out for several hours.
- Chill Time is Mandatory: This No Bake Banana Pudding needs at least 4 hours (ideally overnight) in the fridge. This allows the wafers to soften into a cake-like texture.
- Stabilize Your Cream: If you are serving this in a warm environment, adding a tablespoon of instant vanilla pudding mix to your whipped cream will keep it from melting.
- Temperature Control: Ensure your milk and heavy cream are ice-cold. This ensures the pudding sets instantly and the cream reaches maximum volume.
The Science of Softened Wafers
Ever wonder why the wafers in a No Bake Banana Pudding taste like sponge cake? It’s a process called moisture migration. The wafers pull water from the pudding, which softens the starch molecules in the cookie. This creates a unified texture where the spoon glides through the layers effortlessly. If you eat it too soon, the wafers will be “crunchy,” which breaks the sensory flow of the dish.
What to Serve With This Southern Delight
This dessert is the perfect finale to a heavy, savory meal. To balance the sweetness of the pudding, consider starting your dinner with a hearty chicken club sandwich or perhaps a refreshing classic ambrosia fruit salad for a full retro spread. If you are hosting a summer BBQ, the creamy texture of the pudding pairs beautifully with the crunch of a tangy jalapeno slaw or a cold marinated cauliflower salad.
Frequently Asked Questions
Absolutely! The layering process remains the same. Individual mason jars are perfect for parties and ensure everyone gets the perfect ratio of wafer, banana, and cream.
Yes, but you must let the cooked pudding cool completely to room temperature before folding in the whipped cream. Instant pudding is preferred for this no-bake version because it sets faster and offers a denser structure for the trifle layers.
The pudding acts as a seal against oxygen, which prevents browning. However, choosing firm-ripe bananas and tossing slices in a little lemon juice or pineapple juice adds an extra layer of protection.
For the best texture, let the pudding chill for at least 4 to 8 hours. This allows the wafers to absorb moisture from the custard, giving them a soft, cake-like consistency.
Freezing is not recommended as the bananas will turn black and the custard texture can become grainy and watery upon thawing. This dish is best enjoyed fresh from the refrigerator.
The Official No Bake Banana Pudding Master Recipe
No Bake Banana Pudding: The Ultimate Southern Trifle Recipe
Ingredients
Equipment
Method
- In a large bowl, whisk together the sweetened condensed milk and cold whole milk until smooth.
- Add the instant vanilla pudding mix and whisk vigorously for 2 minutes. Let sit for 5 minutes until thick and pale yellow.
- Whip 1 cup (240ml) of heavy cream to stiff peaks and gently fold into the set pudding.
- Place a layer of whole vanilla wafers at the bottom of the trifle bowl.
- Spread a layer of pudding. Press banana slices against the glass walls and fill the center with more bananas.
- Continue layering wafers, pudding, and bananas until the bowl is nearly full, ending with a pudding layer.
- Whip the remaining 1 cup (240ml) of heavy cream with powdered sugar and vanilla. Spread over the pudding.
- Decorate the top with 3 whole wafers and a dusting of crushed cookie crumbs.
Notes
Chill for at least 4 hours before serving to allow wafers to soften properly.
Closing and Call to Action
The No Bake Banana Pudding is more than just a recipe; it is a tradition in a bowl. By following these forensic steps to layer your wafers and bananas, you’ll create a dessert that looks like it belongs on a professional food blog but tastes like home. If you enjoyed this guide, please leave a comment below and share your results! Don’t forget to follow us on Pinterest for more visually stunning recipe inspiration.


