There is a specific culinary magic that happens when high-velocity hot air meets the humble garden vegetable. These Air Fryer Green Beans are the definitive proof that you don’t need a deep fryer or a complicated setup to achieve restaurant-quality results at home. Imagine a dish where every bite offers a satisfying snap, followed by the deep, savory notes of toasted garlic and a finish of crystalline sea salt.
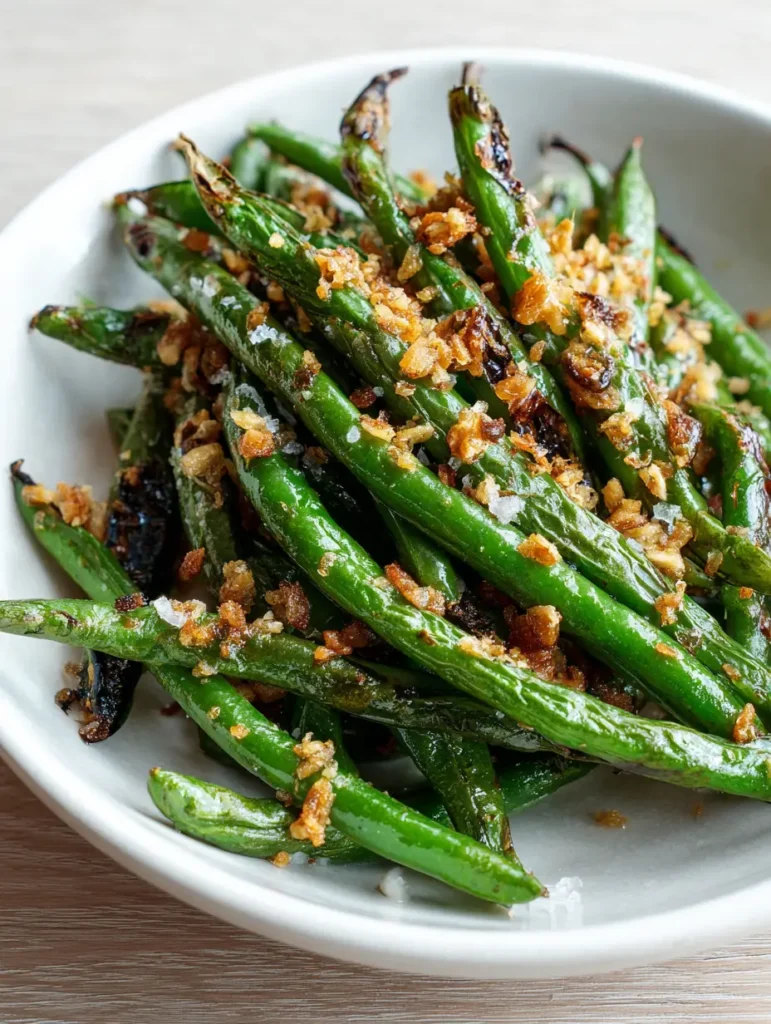
In this recipe, we are moving far beyond the soggy, over-steamed greens of the past. We are aiming for a specific visual and textural profile: wrinkled, blistered skins, dark brown charred edges, and a glistening coat of premium oil. When served in a shallow white bowl, the vibrant green contrast against the golden-brown garlic bits is nothing short of stunning.
Whether you are looking for a quick weeknight side or a sophisticated addition to a dinner party, these Air Fryer Green Beans deliver maximum flavor with minimal effort. This is handheld smartphone-photo-worthy food that tastes even better than it looks, providing a healthy yet indulgent experience for any home cook.
Why You’ll Crave These Blistered Air Fryer Green Beans
- The Perfect Texture: By utilizing the convection power of the air fryer, we achieve a distinct “blistered” skin that mimics the effect of a high-heat wok or professional grill.
- Visual Appeal: The contrast between the deep mahogany charred tips and the bright, oil-glistening bean bodies creates a professional plating aesthetic.
- Garlic Intensity: Unlike roasted garlic which turns soft, these minced bits become “garlic chips”—crispy, golden-brown, and packed with concentrated flavor.
- Scientific Efficiency: This method reduces the cooking time by 40% compared to traditional oven roasting while ensuring a more even distribution of heat.
The Anatomy of Ingredients for the Ultimate Char
Achieving the visual blueprint of this dish requires specific ingredients that respond predictably to high heat. Every component plays a structural or flavor-driven role in the final Air Fryer Green Beans presentation.
Fresh Green Beans (1 lb / 450g): It is critical to use fresh beans rather than frozen or canned to achieve the characteristic wrinkled, blistered texture. Look for bright green, snap-fresh pods that are uniform in thickness for even charring.
Extra Virgin Olive Oil (1.5 tbsp / 22ml): The oil serves as the heat conductor, allowing the skin of the bean to fry rather than just dry out. It provides that essential glistening layer seen in the professional photography of this dish.
Fresh Garlic Cloves (4 units / 20g): Minced finely, these cloves transform into the golden-brown “bits” that top the beans. Fresh garlic contains the natural sugars necessary for the Maillard reaction to occur in the air fryer basket.
Coarse Sea Salt (1 tsp / 5g): We use coarse salt specifically for its visual “dusting” effect and the irregular bursts of salinity it provides. Fine table salt would simply dissolve and disappear into the oil glaze.
Foundational Black Pepper (0.5 tsp / 2g): While invisible in the final photo, a touch of freshly cracked black pepper adds a foundational heat that cuts through the richness of the olive oil glaze.
Professional Kitchen Equipment Required
To replicate the exact visual results of the Air Fryer Green Beans, you will need a few standard kitchen tools. The right equipment ensures the air circulates perfectly around each bean.
Large Air Fryer (5-quart or larger): A larger basket prevents overcrowding. If the beans are piled too high, they will steam instead of blister, ruining the “charred edges” effect.
Stainless Steel Mixing Bowl: Essential for the “toss” phase. You need to ensure every single bean is encapsulated in a thin, even layer of oil before they enter the heat.
Sharp Chef’s Knife: To achieve those numerous small, crispy bits of garlic, you need a precise mince. A dull knife will bruise the garlic, making it bitter rather than sweet and toasted.

Mastering the Blister: Step-by-Step Instructions
Phase 1: Preparation and The Oil Glaze
Start by washing your 1 lb (450g) of green beans in cold water. It is imperative that you dry them thoroughly with a kitchen towel or salad spinner. Any residual moisture will create steam, which prevents the “wrinkled” texture from forming.
Trim the stem ends of the beans, leaving the tapered “tails” for a rustic look. In a large bowl, combine the beans with 1.5 tbsp (22ml) of olive oil and 1 tsp (5g) of coarse sea salt. Toss vigorously until the beans have a uniform, glistening layer of oil.
Phase 2: The Initial Air Fryer Blast
Preheat your air fryer to 400°F (200°C). This high temperature is the secret to getting those dark brown charred edges without overcooking the interior. Place the beans in the basket, spreading them as evenly as possible.
Set the timer for 10 minutes total, but we will be intervening twice. Slide the basket in and let the beans air fry for the first 5 minutes. You will start to hear a faint sizzling sound as the oil begins to blister the bean skins.
Phase 3: The Garlic Integration
After 5 minutes, open the basket. You should see the beans starting to look slightly wrinkled. Now, add your 4 cloves (20g) of minced garlic. We add the garlic at the halfway mark to ensure it turns golden-brown and crispy without burning to a bitter black cinder.
Shake the basket thoroughly to distribute the garlic. Continue cooking for another 3 to 5 minutes. Watch for the visual cue: the garlic should be golden-brown and the tips of the green beans should show dark brown char marks.
Phase 4: Finishing and Plating
Transfer the Air Fryer Green Beans immediately to a shallow white bowl. Ensure you scrape all the crispy garlic bits from the bottom of the basket and scatter them over the top. The residual heat will continue to intensify the aroma of the garlic and salt.
Culinary Secrets for Perfect Char Every Time
- Don’t Overcrowd: If you are making a double batch, cook in two stages. Air circulation is the only way to get that professional charred edge.
- The Dryness Factor: I cannot emphasize enough that dry beans equal crispy beans. Pat them down until the paper towel comes away bone-dry.
- Oil Selection: While we use olive oil for flavor, avocado oil is a great substitute if you want an even higher smoke point for more aggressive charring.
- Shake Often: A vigorous shake at the 5-minute and 8-minute marks ensures the beans don’t stick and the garlic fries evenly on all sides.
Managing Leftovers and Reheating
While these Air Fryer Green Beans are best served immediately to enjoy the “crispy” garlic, they can be stored in an airtight container for up to 3 days. To reheat, avoid the microwave, as it will make the beans limp and rubbery.
Instead, pop them back into the air fryer at 350°F (175°C) for 2-3 minutes. This will revive the glistening oil glaze and return some of the crunch to the garlic bits. Freezing is not recommended for this specific recipe, as the cellular structure of the bean collapses upon thawing, losing that iconic blistered texture.
The Perfect Pairings: What to Serve with Garlicky Green Beans
These beans are incredibly versatile and act as the perfect savory side for a variety of proteins. For a casual lunch, they pair beautifully with a Oklahoma onion smash burger, where the charred beans mimic the caramelized notes of the onions.
If you are looking for a lighter dinner, serve them alongside juicy grilled chicken bites or a refreshing tangy jalapeno slaw (coming soon). The garlic in the beans also complements the deep savory flavors of spicy garlic beef croquettes (coming soon), creating a cohesive, garlic-forward meal.
Answers to Your Burning Questions
While you can air fry frozen green beans, they will not achieve the same blistered, wrinkled texture as fresh beans due to the extra moisture. For the results seen in our photos, fresh is best.
No. The air fryer’s high heat (400°F) is sufficient to tenderize the interior while crisping the exterior simultaneously.
Make sure the beans are perfectly dry after washing and avoid overcrowding the basket. Air must circulate around each bean for maximum crispness.
Extra virgin olive oil offers the best flavor, but avocado oil is excellent if you prefer a higher smoke point for more aggressive charring.
Garlic burns much faster than beans cook. Ensure you only add the minced garlic during the last 3-5 minutes of the cooking cycle to keep it golden and sweet.
The Definitive Air Fryer Green Beans Recipe Card
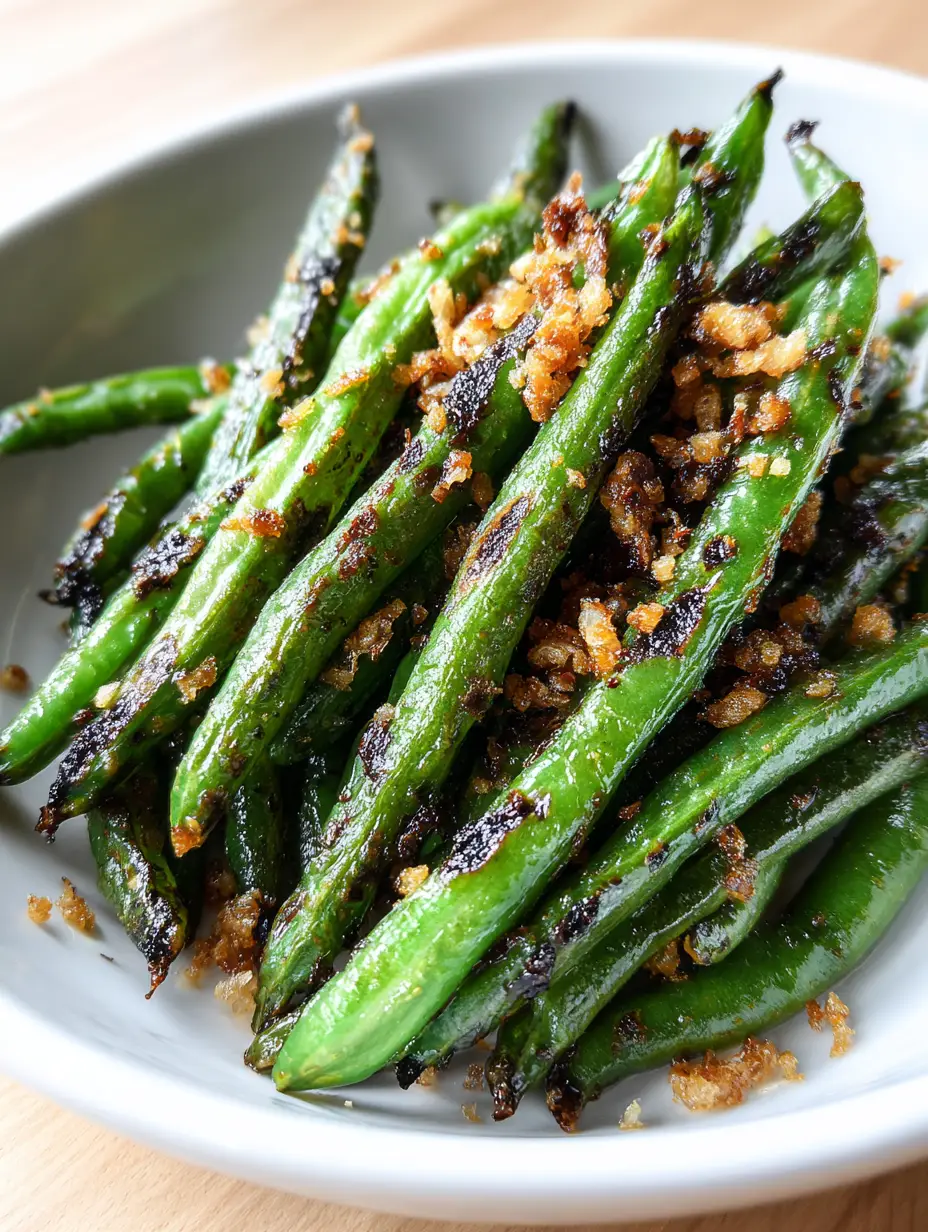
Air Fryer Green Beans with Crispy Minced Garlic and Sea Salt
Ingredients
Equipment
Method
- Wash the green beans and dry them completely with a towel. Moisture prevents blistering.
- In a large bowl, toss the beans with olive oil, sea salt, and black pepper until glistening and evenly coated.
- Place beans in a preheated 400°F (200°C) air fryer for 5 minutes.
- Open the basket, add the minced garlic, and shake well. Air fry for another 3-5 minutes until the garlic is golden-brown and beans have charred edges.
- Transfer to a shallow white bowl, topping with all the crispy garlic bits from the basket.
Notes
Add garlic halfway through to prevent it from burning.
Join the CrispCrumbs Community!
We hope you love the intense flavor and satisfying crunch of these Air Fryer Green Beans. This recipe is designed to bring professional-grade vegetable cookery into your home kitchen with ease. If you enjoyed this dish, please leave a comment below and let us know how your char turned out!
Don’t forget to follow us on Pinterest and share your creations with our community. Sign up for our newsletter to receive the latest kitchen-tested recipes delivered straight to your inbox!


